After logging in, you will be taken to the FlowEQ dashboard
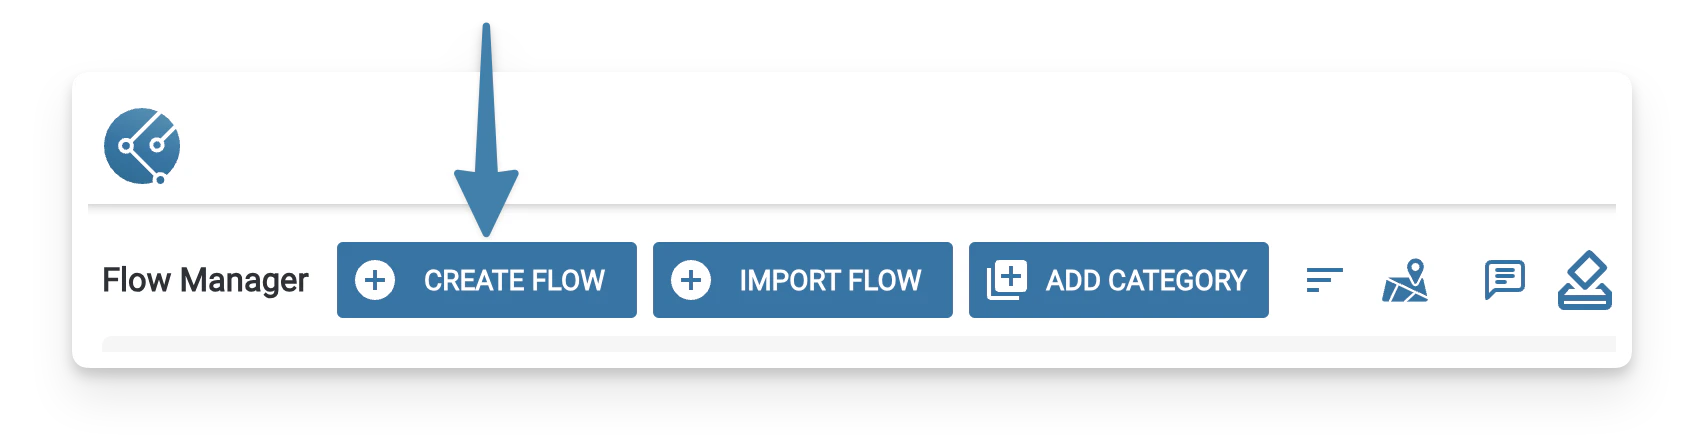
Click the Create Flow button near the top of the window
Give your Flow a title and description
The Flow title and description are used for reference and are used when searching for Flows in Sidekick. It is important to provide appropriate information to help streamline things.
Your Flow will be placed into the default “Unsorted” category. Flows can be categorized later, so don’t worry about that for now.
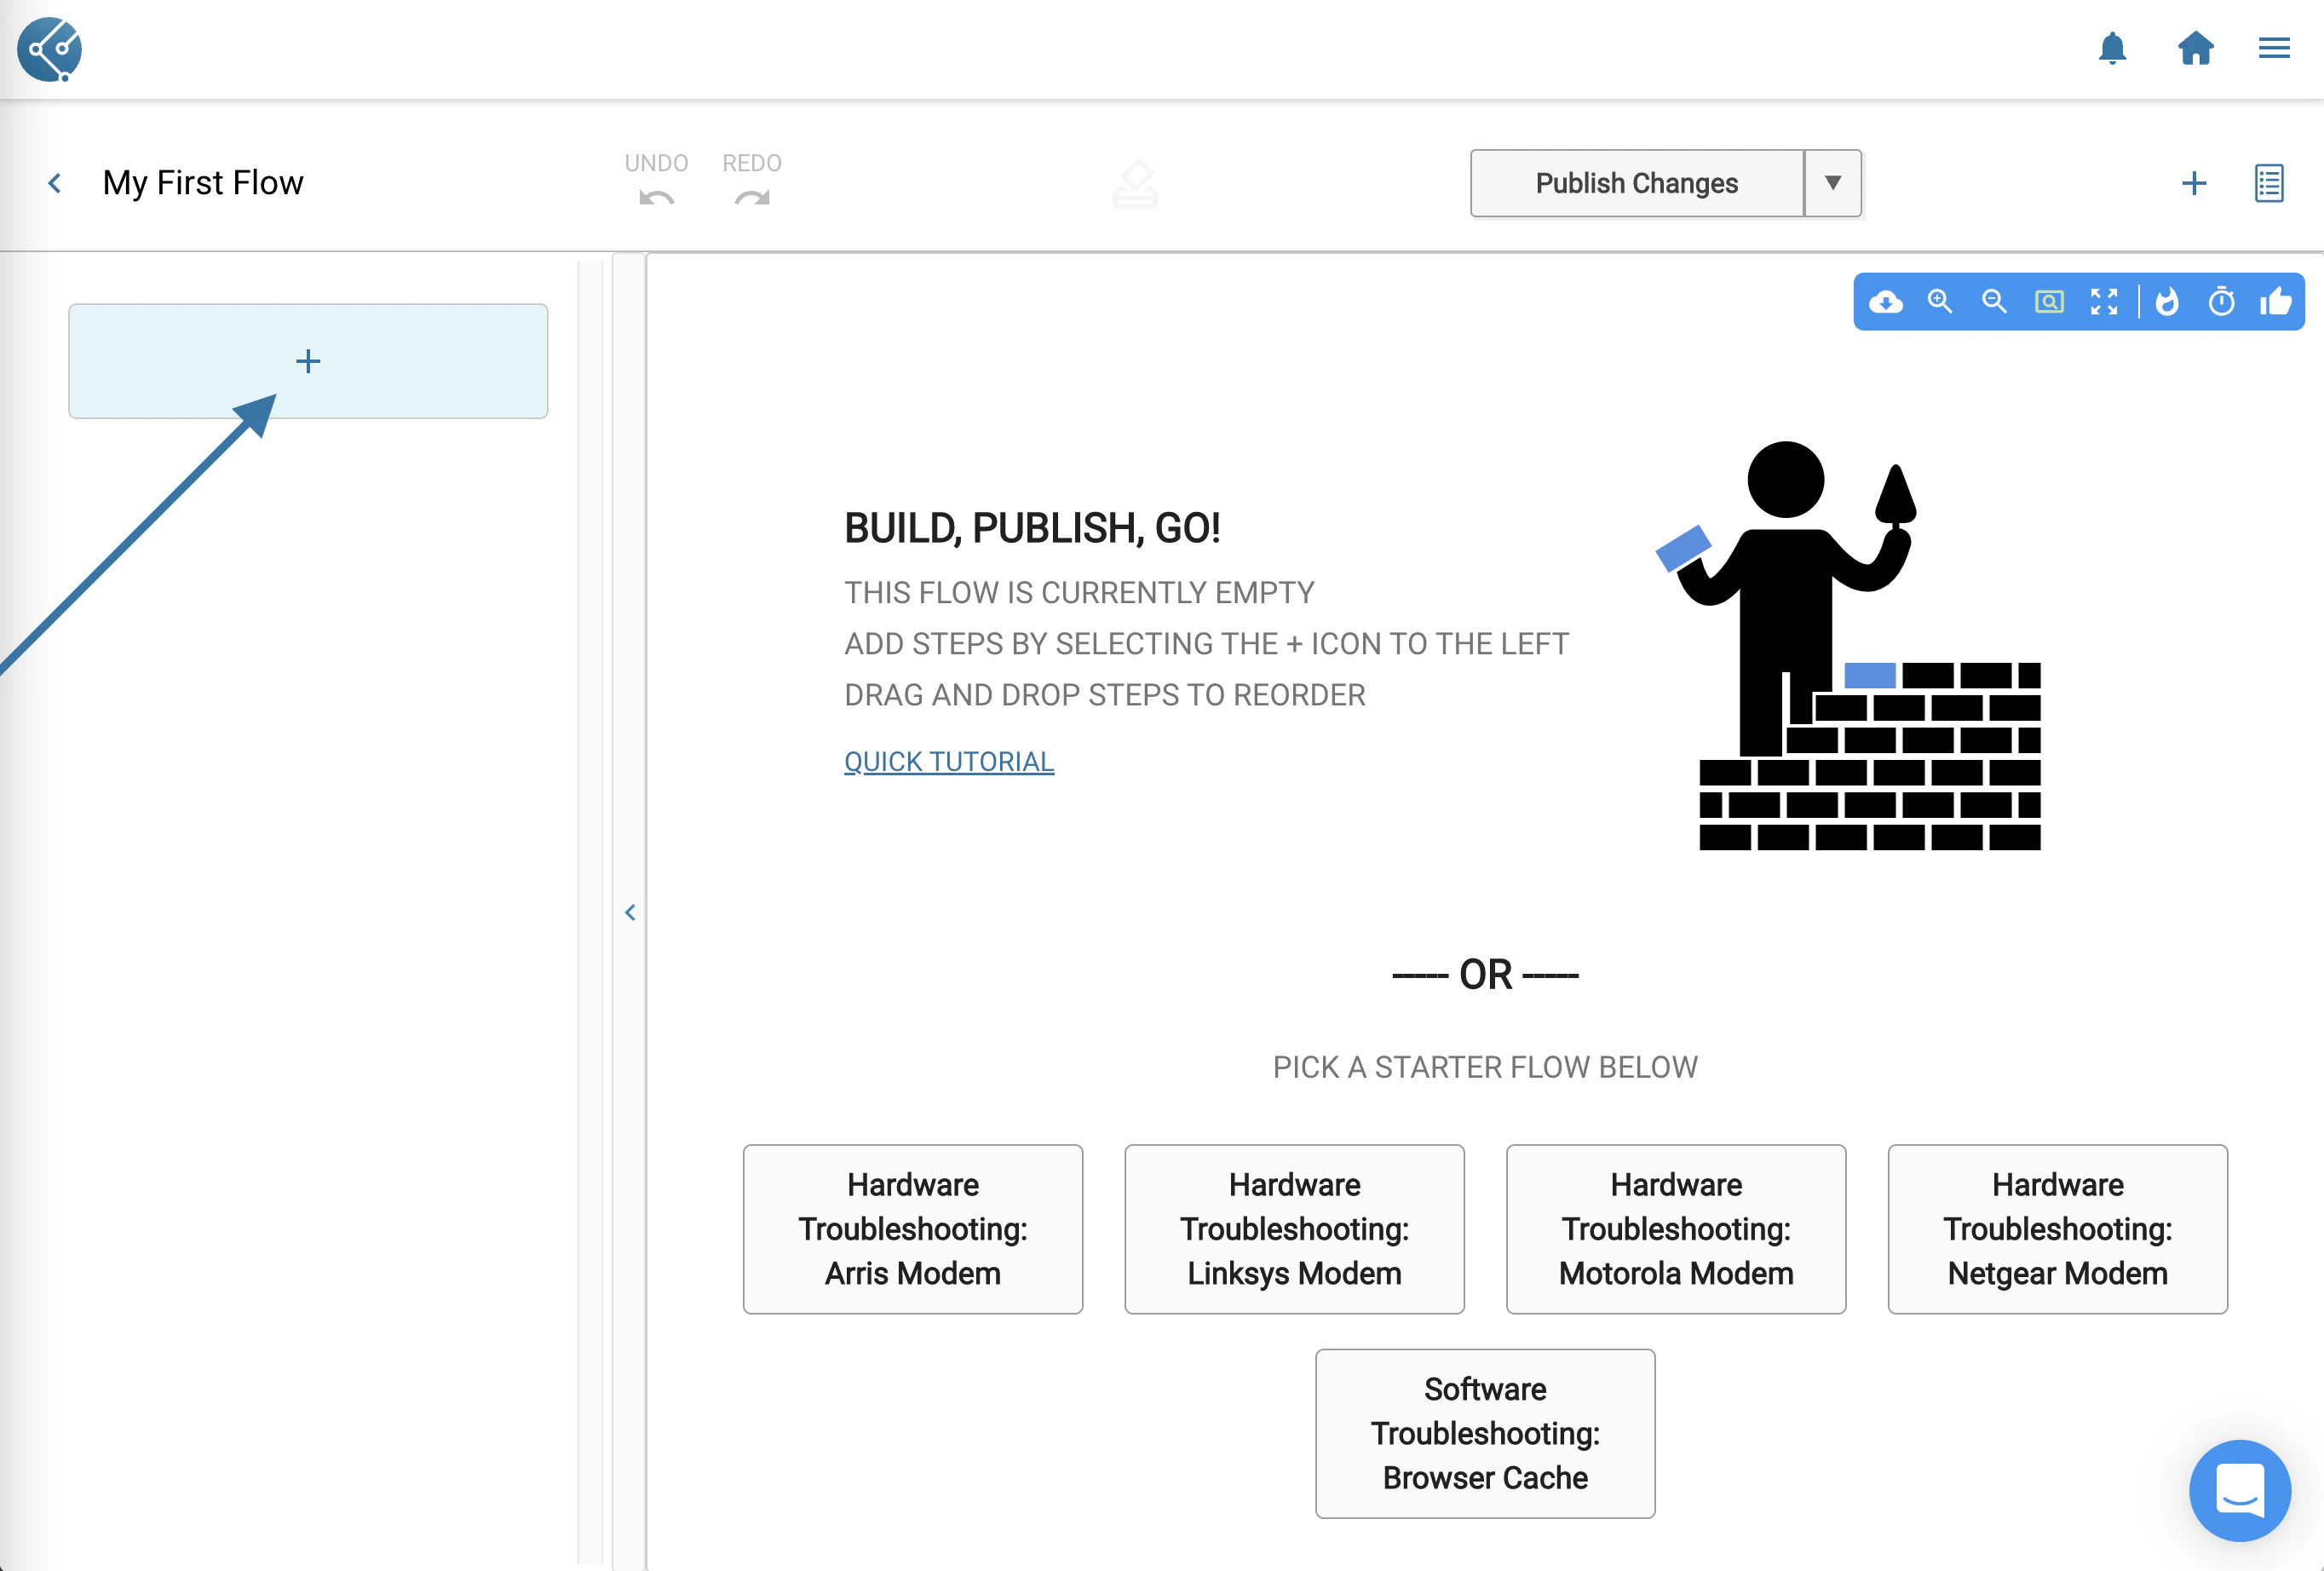
Hit the Save button and you will be brought into Flow Builder
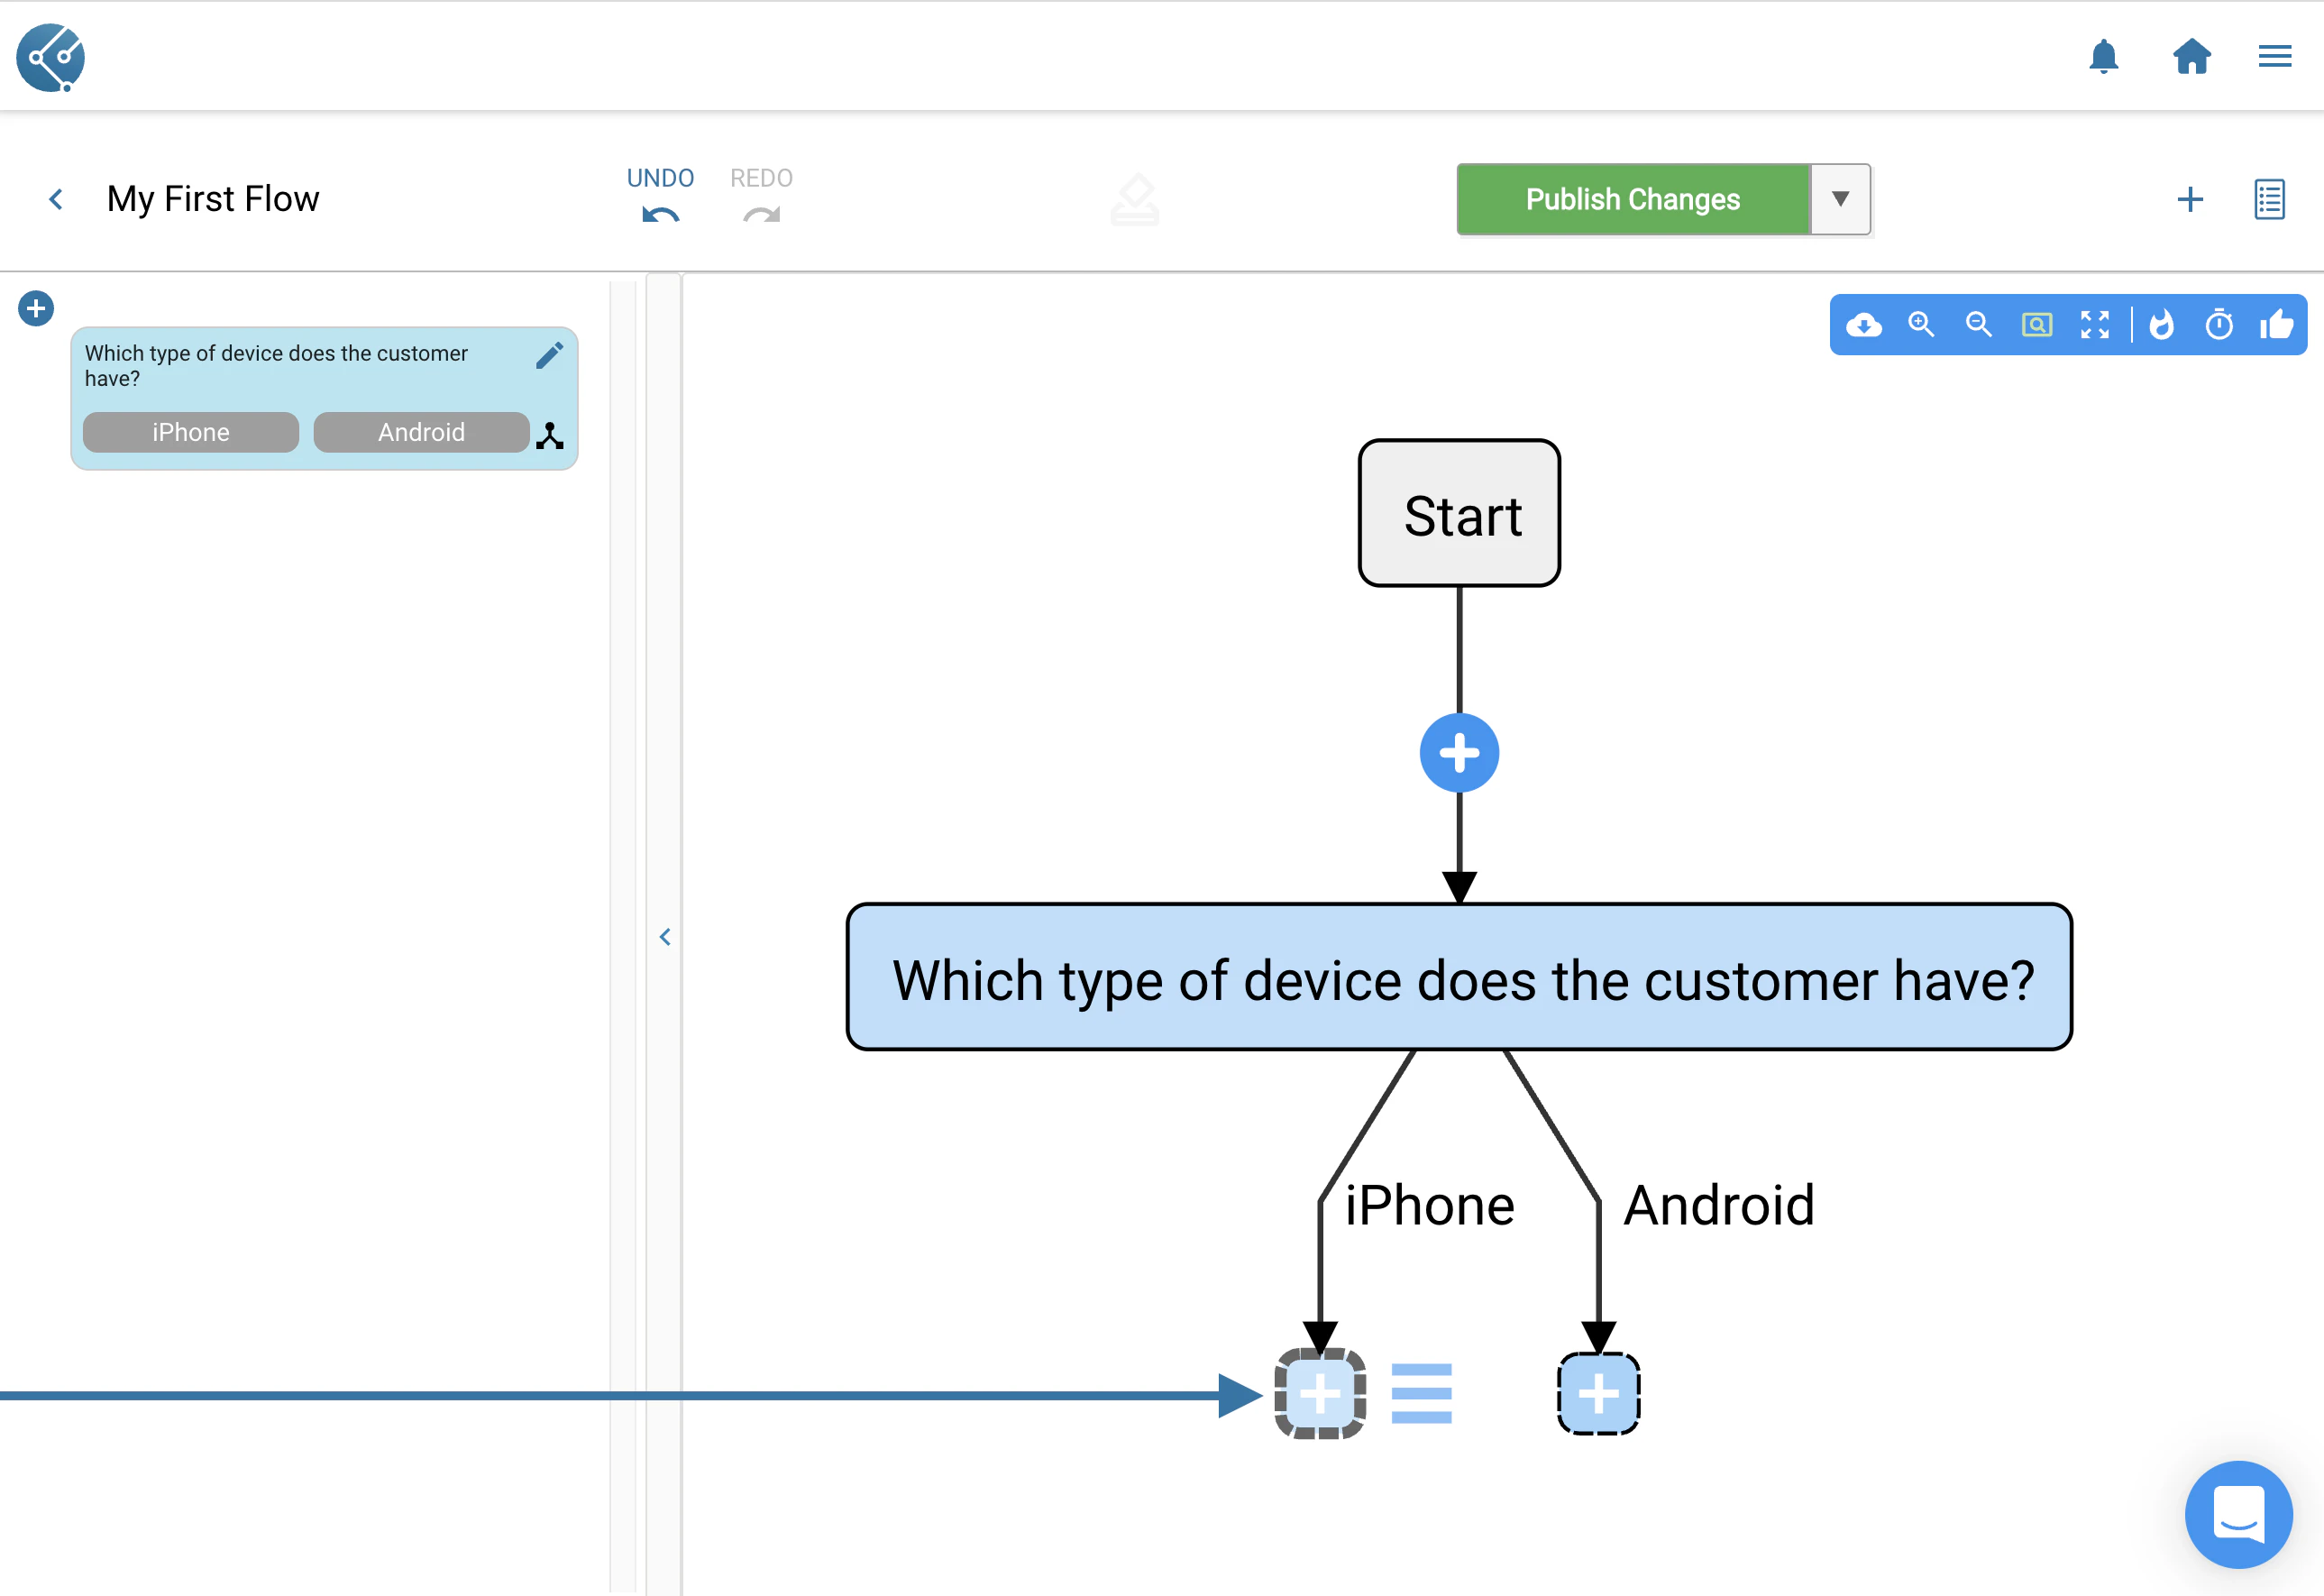
The Decision Tree steptype will be the first step that your team sees when they run the Flow. In this example, we’ll use it for a basic troubleshooting question - what kind of device does the customer have?
Click the button on the left rail to add a step
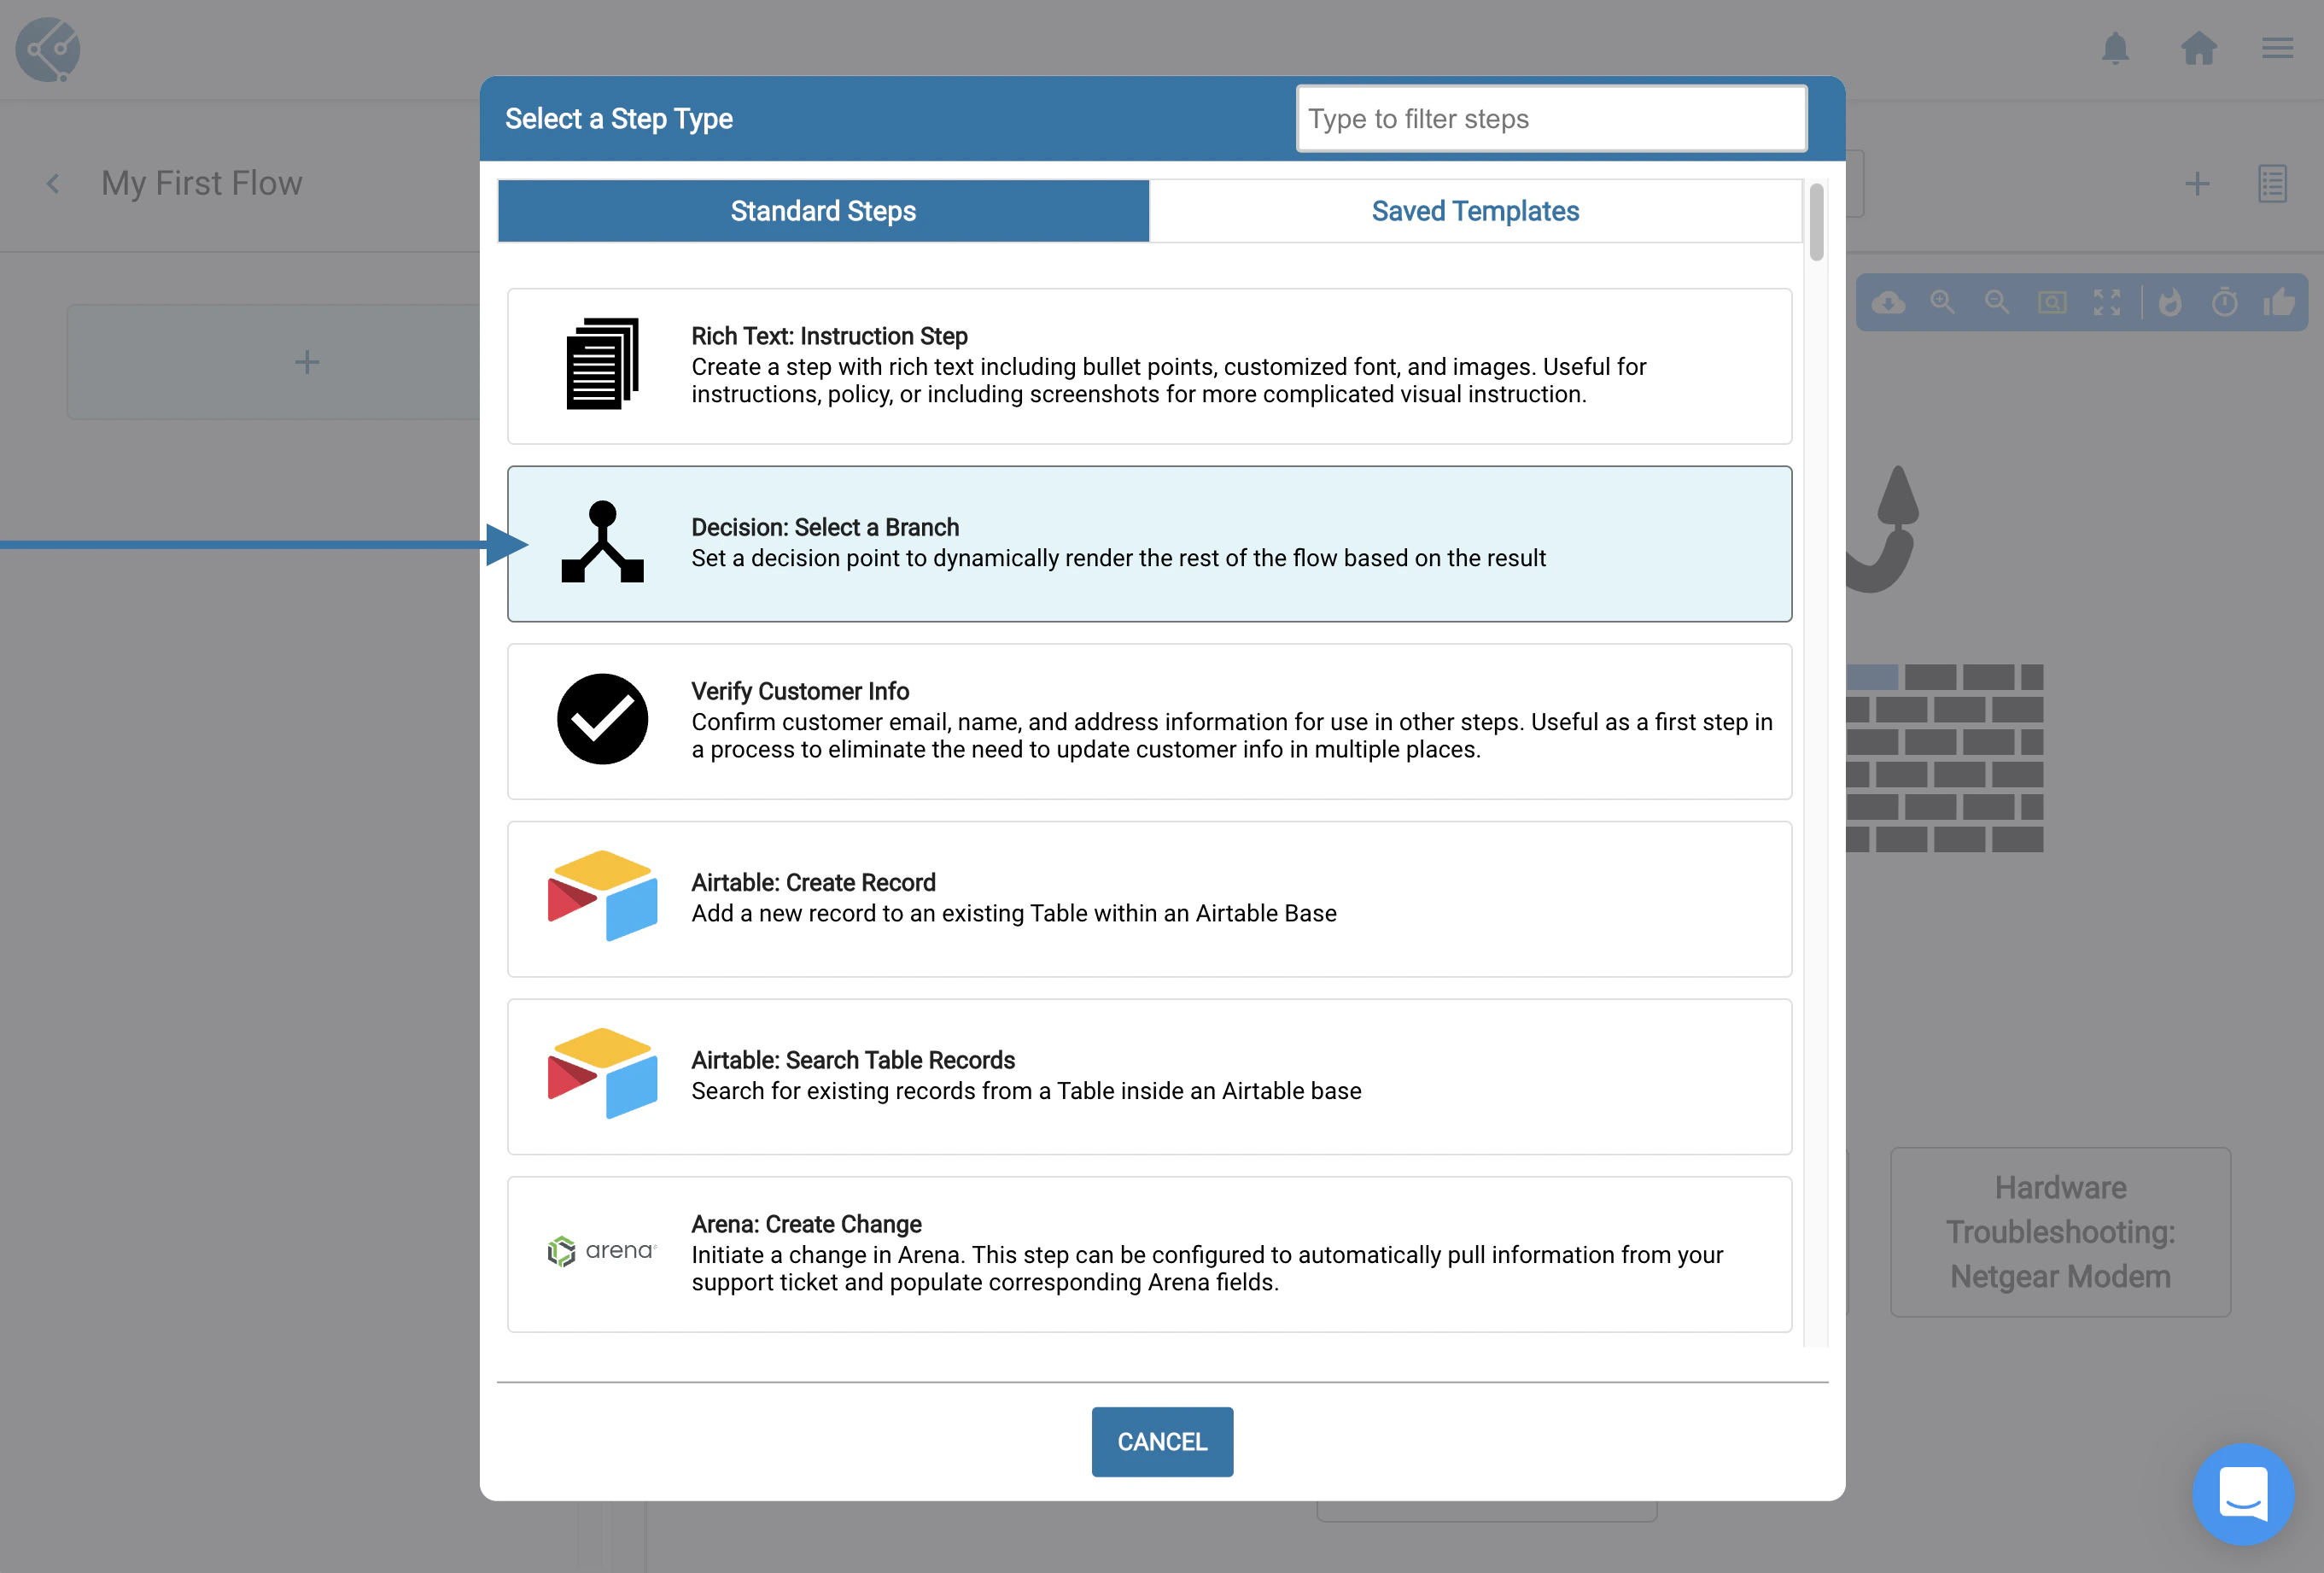
Select the Decision: Select a Branch step type
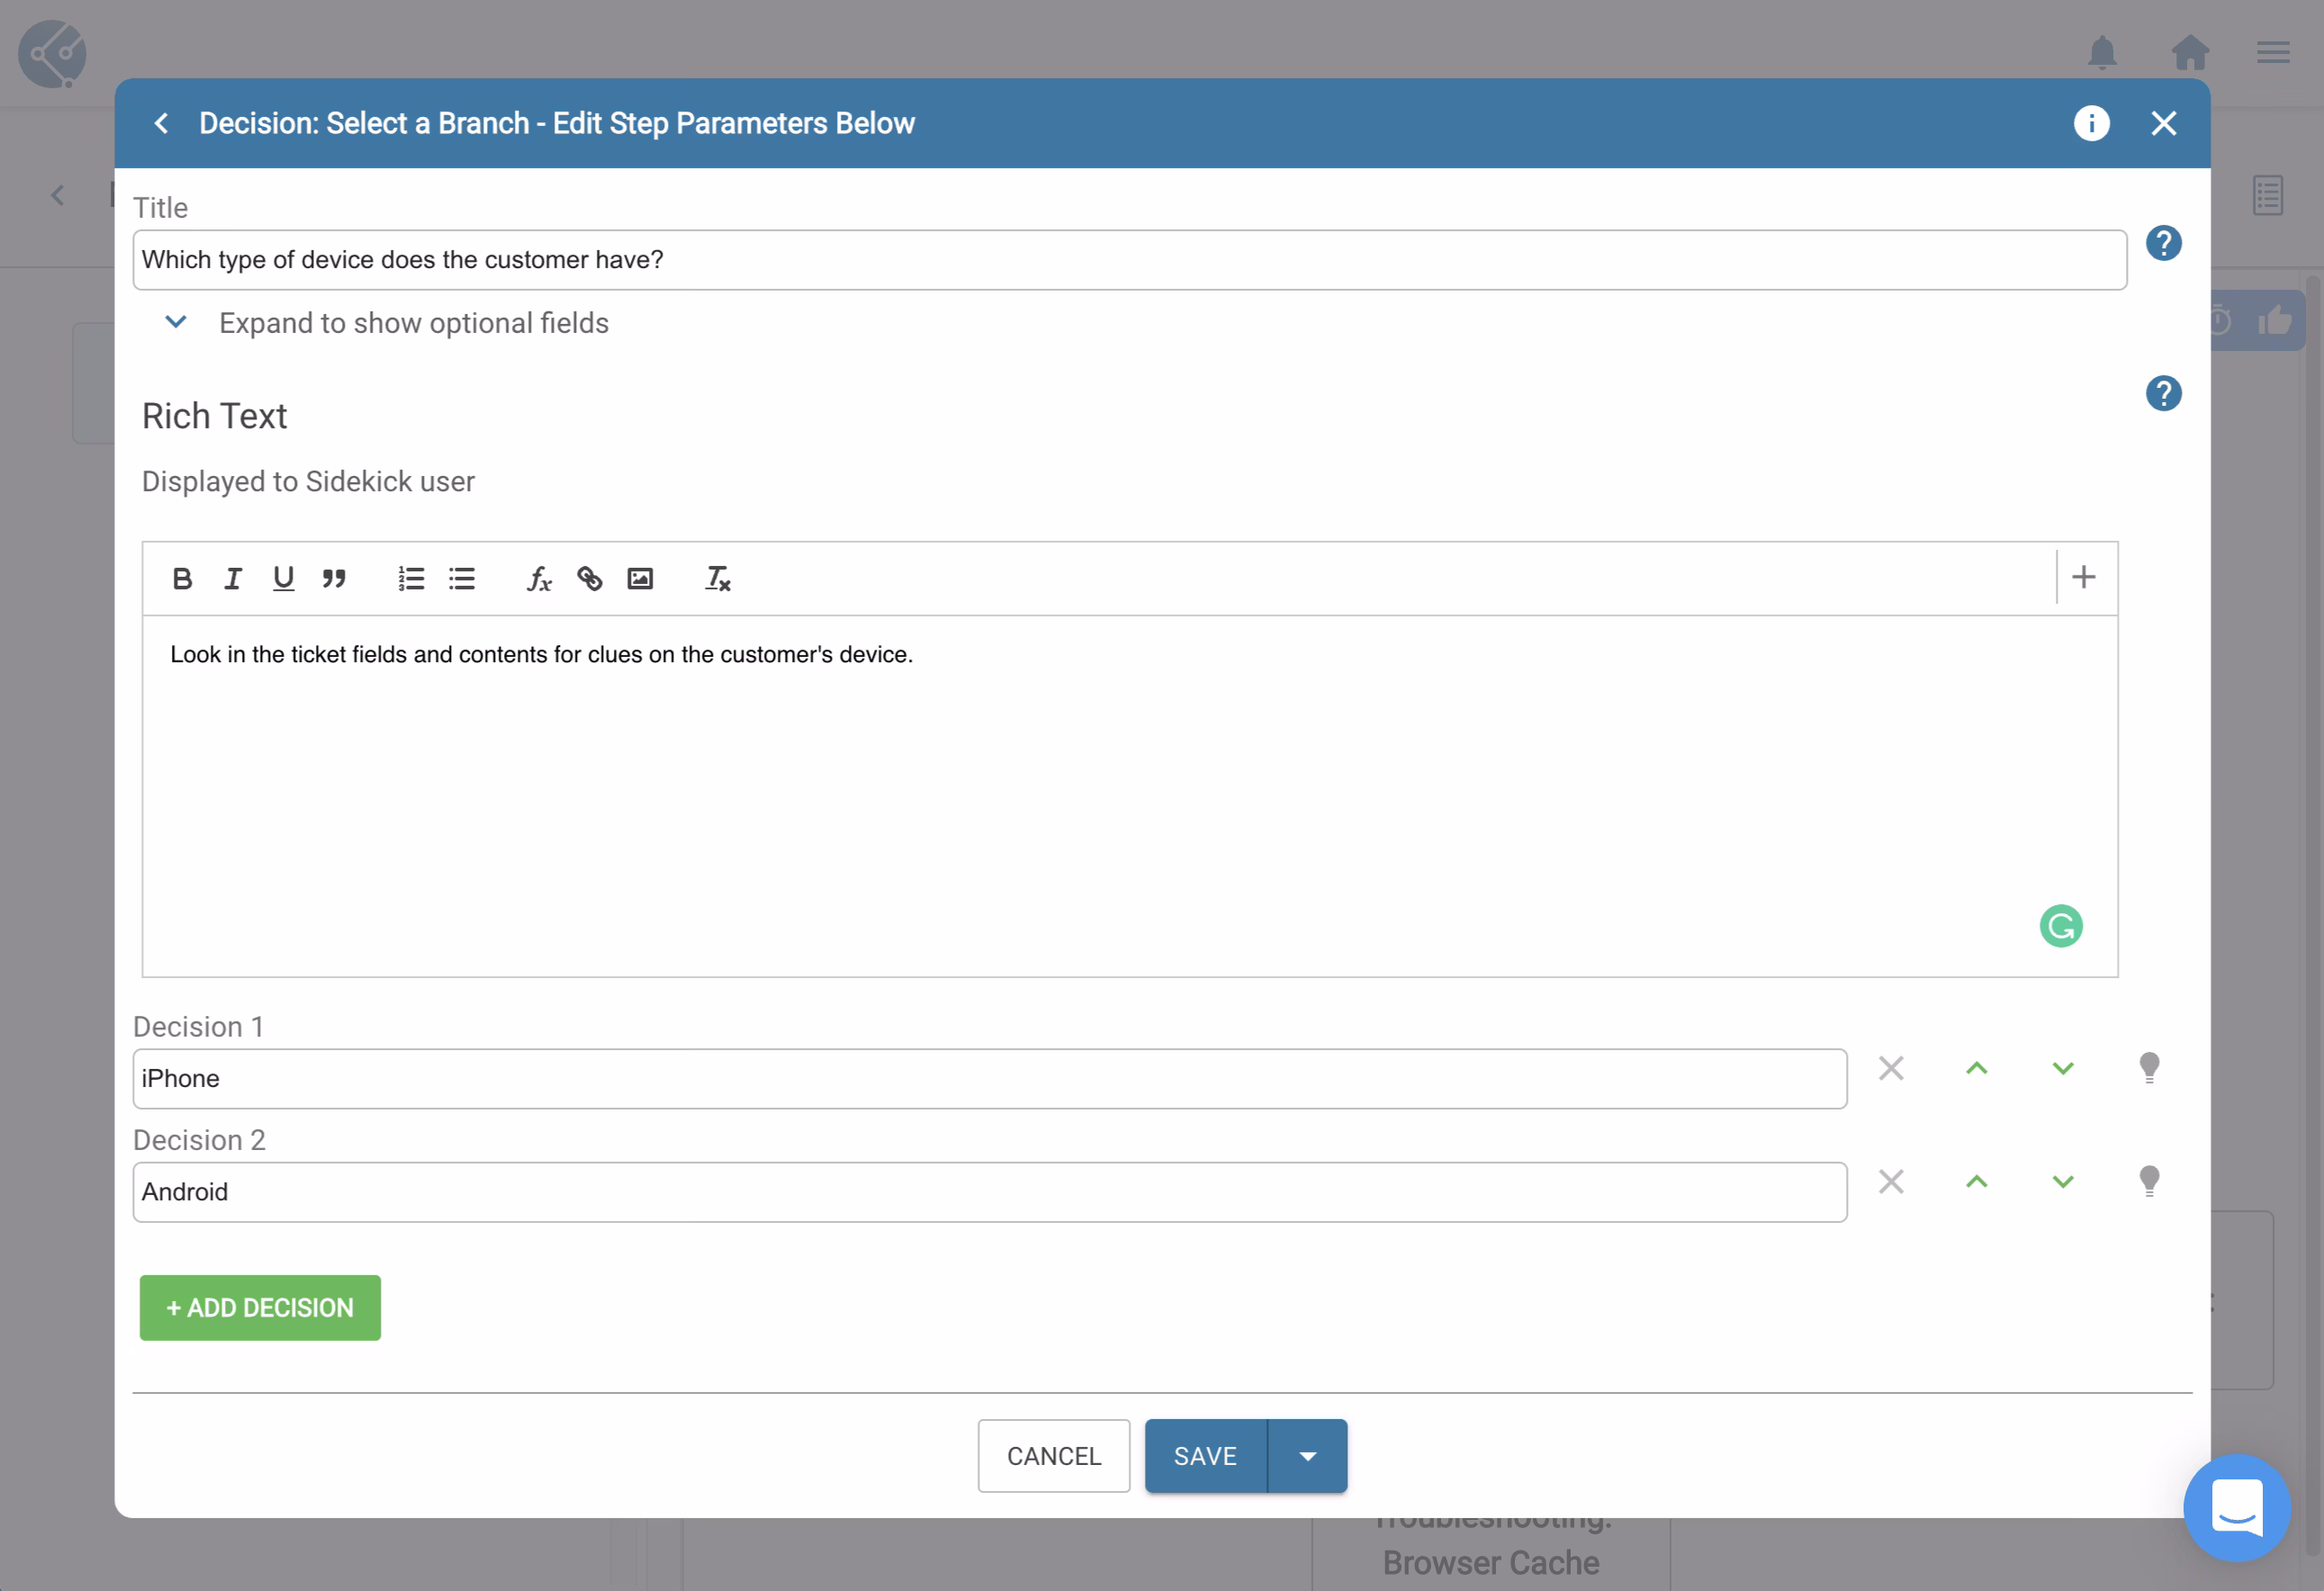
Enter the details below
When you’re done, click Save
TitleThe text entered here will appear up top when your team sees this steptype in your Flow. It’s a great place to summarize exactly what you want your team to do. Since we want your team to answer a question, we’ll write that question into the title field.Rich TextIf you want to give your team more detailed instructions or context for the question, you can enter it here. This text will appear directly below the titleDecisionsUse these fields to give your team choices to decide from. For this example, the question is “Which type of device does the customer have?” so we’ll create two decisions “iPhone” and “Android”.
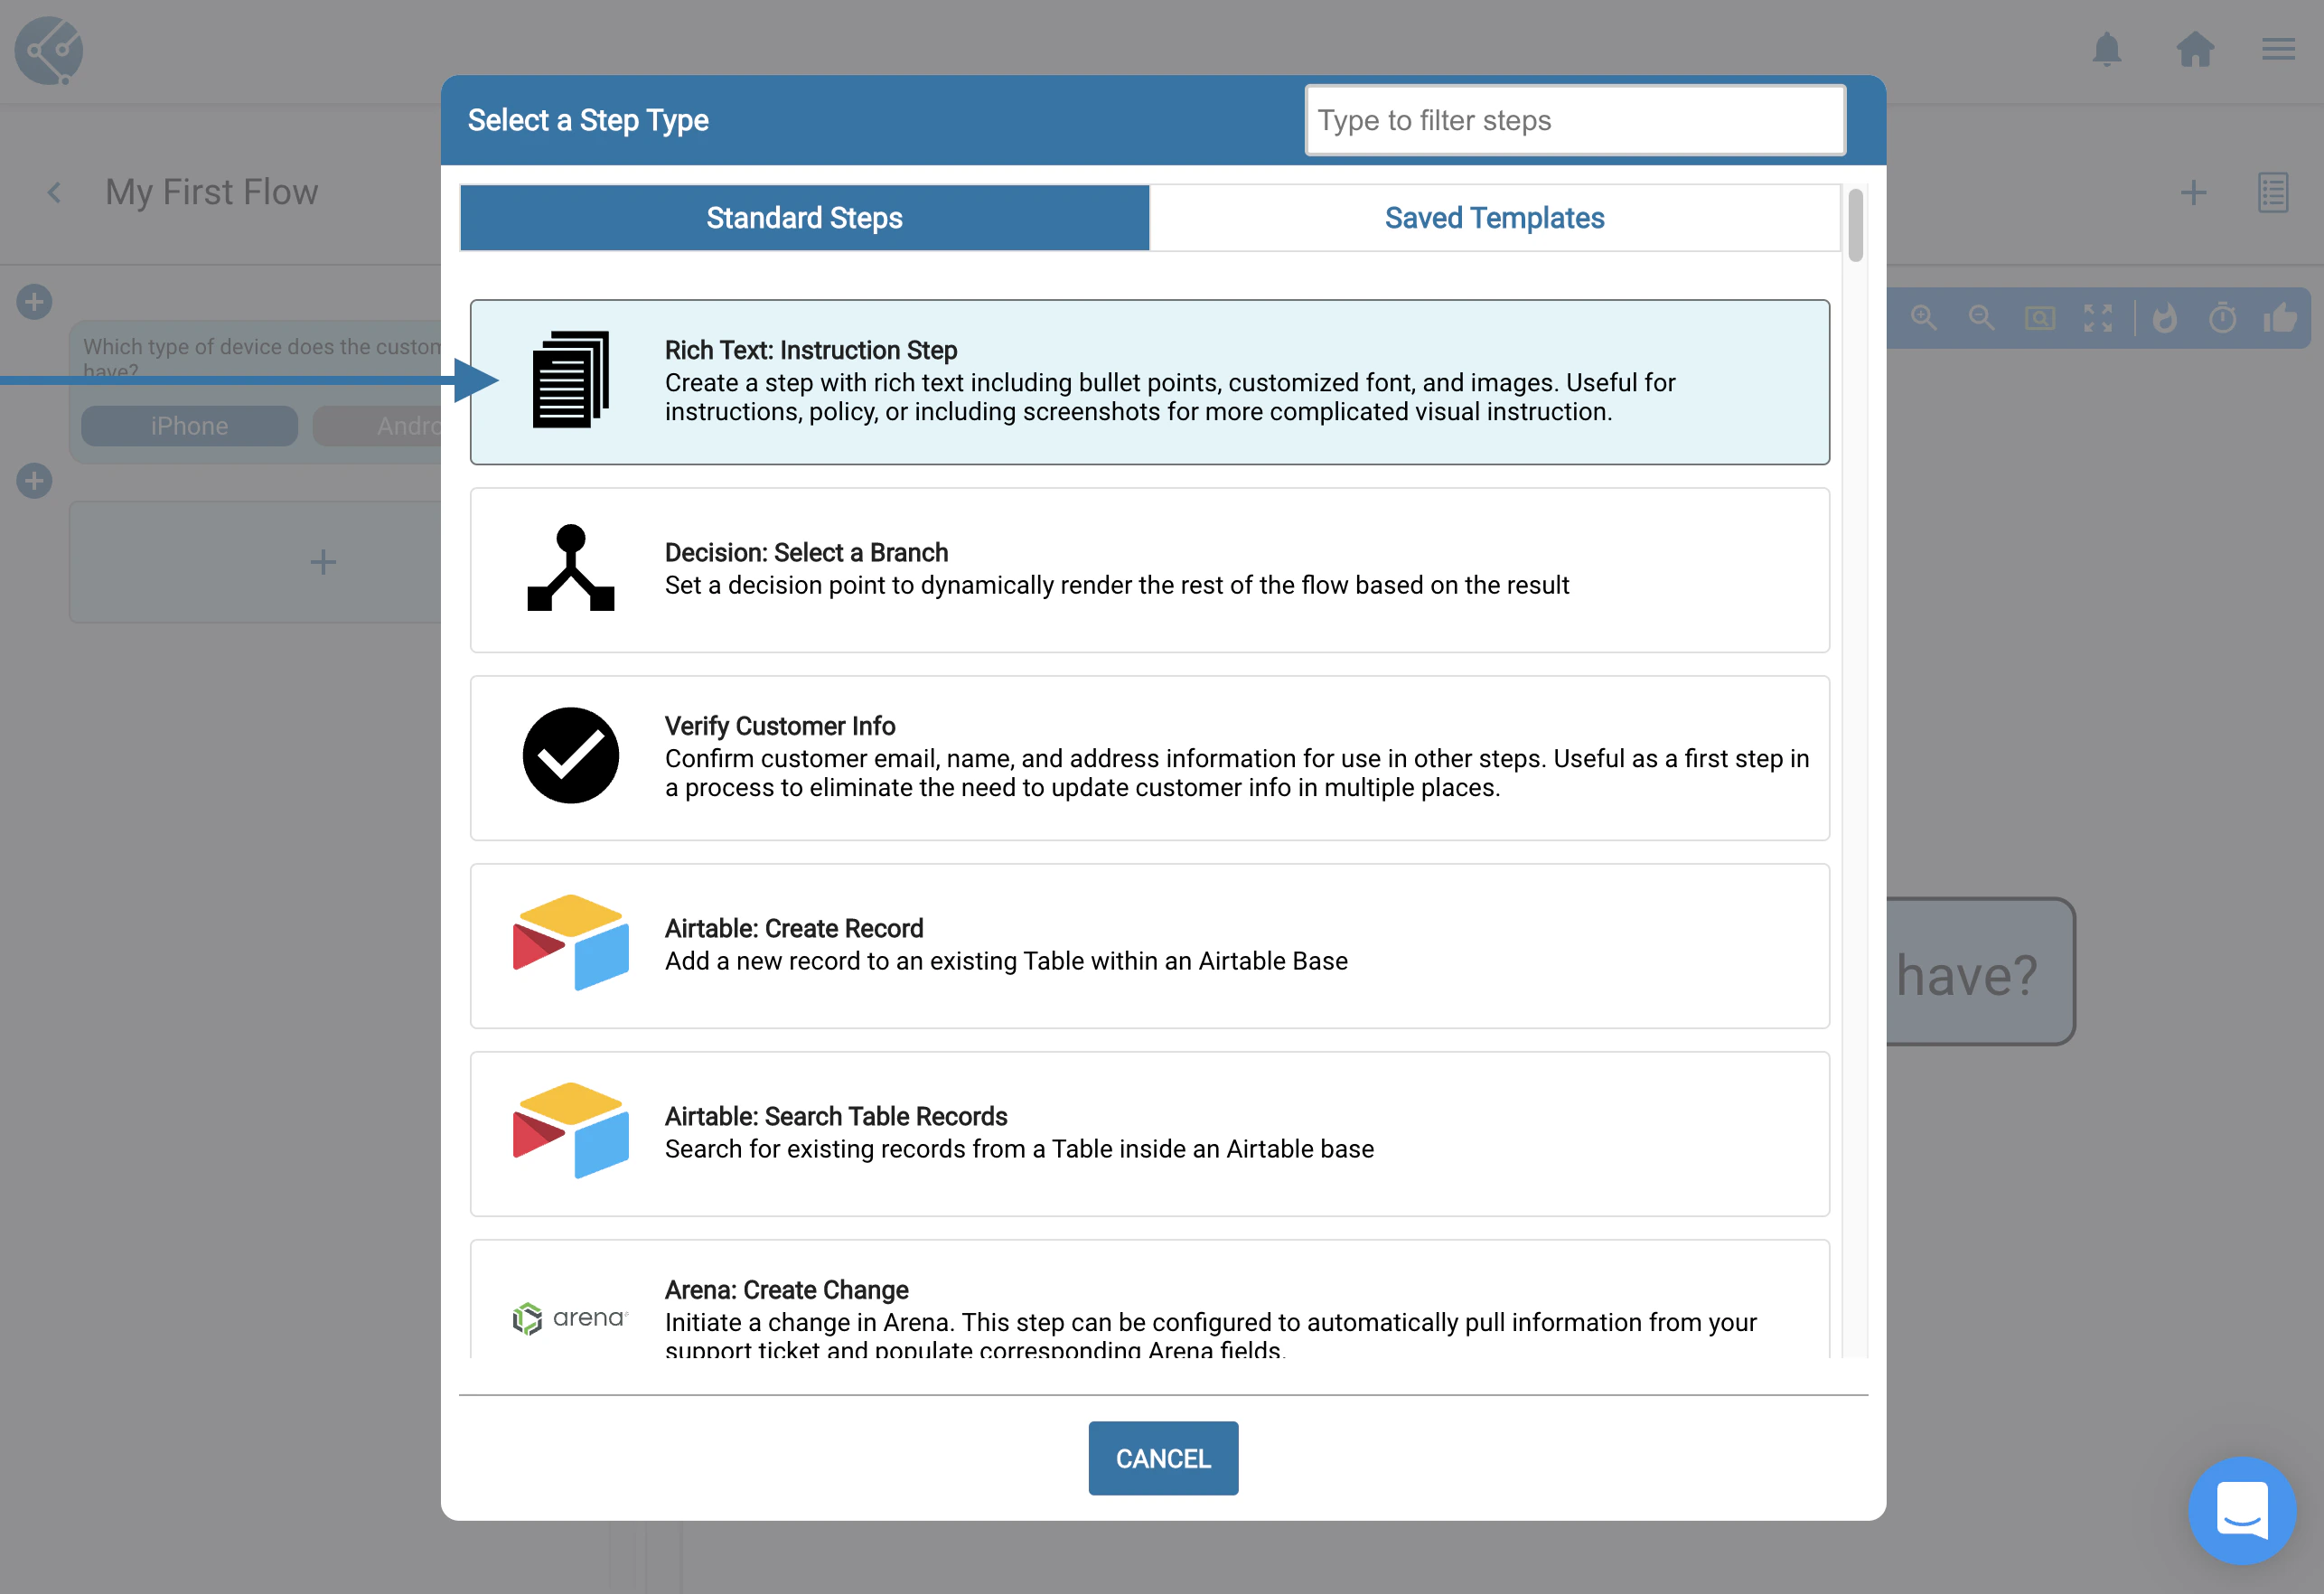
Now that you’ve added decision branches, we need to decide what happens after your team selects an answer.For this example, we’ll assume that after determining the customer’s device type, we’ll need to check the customer’s app version against the latest version in the App Store or Google Play Store. For in-depth instructions like this, we’ll use the Rich Text steptype
Click the under iPhone to build the next step in that branch.
Select the Rich Text steptype
Enter the details below
When you’re done, click Save
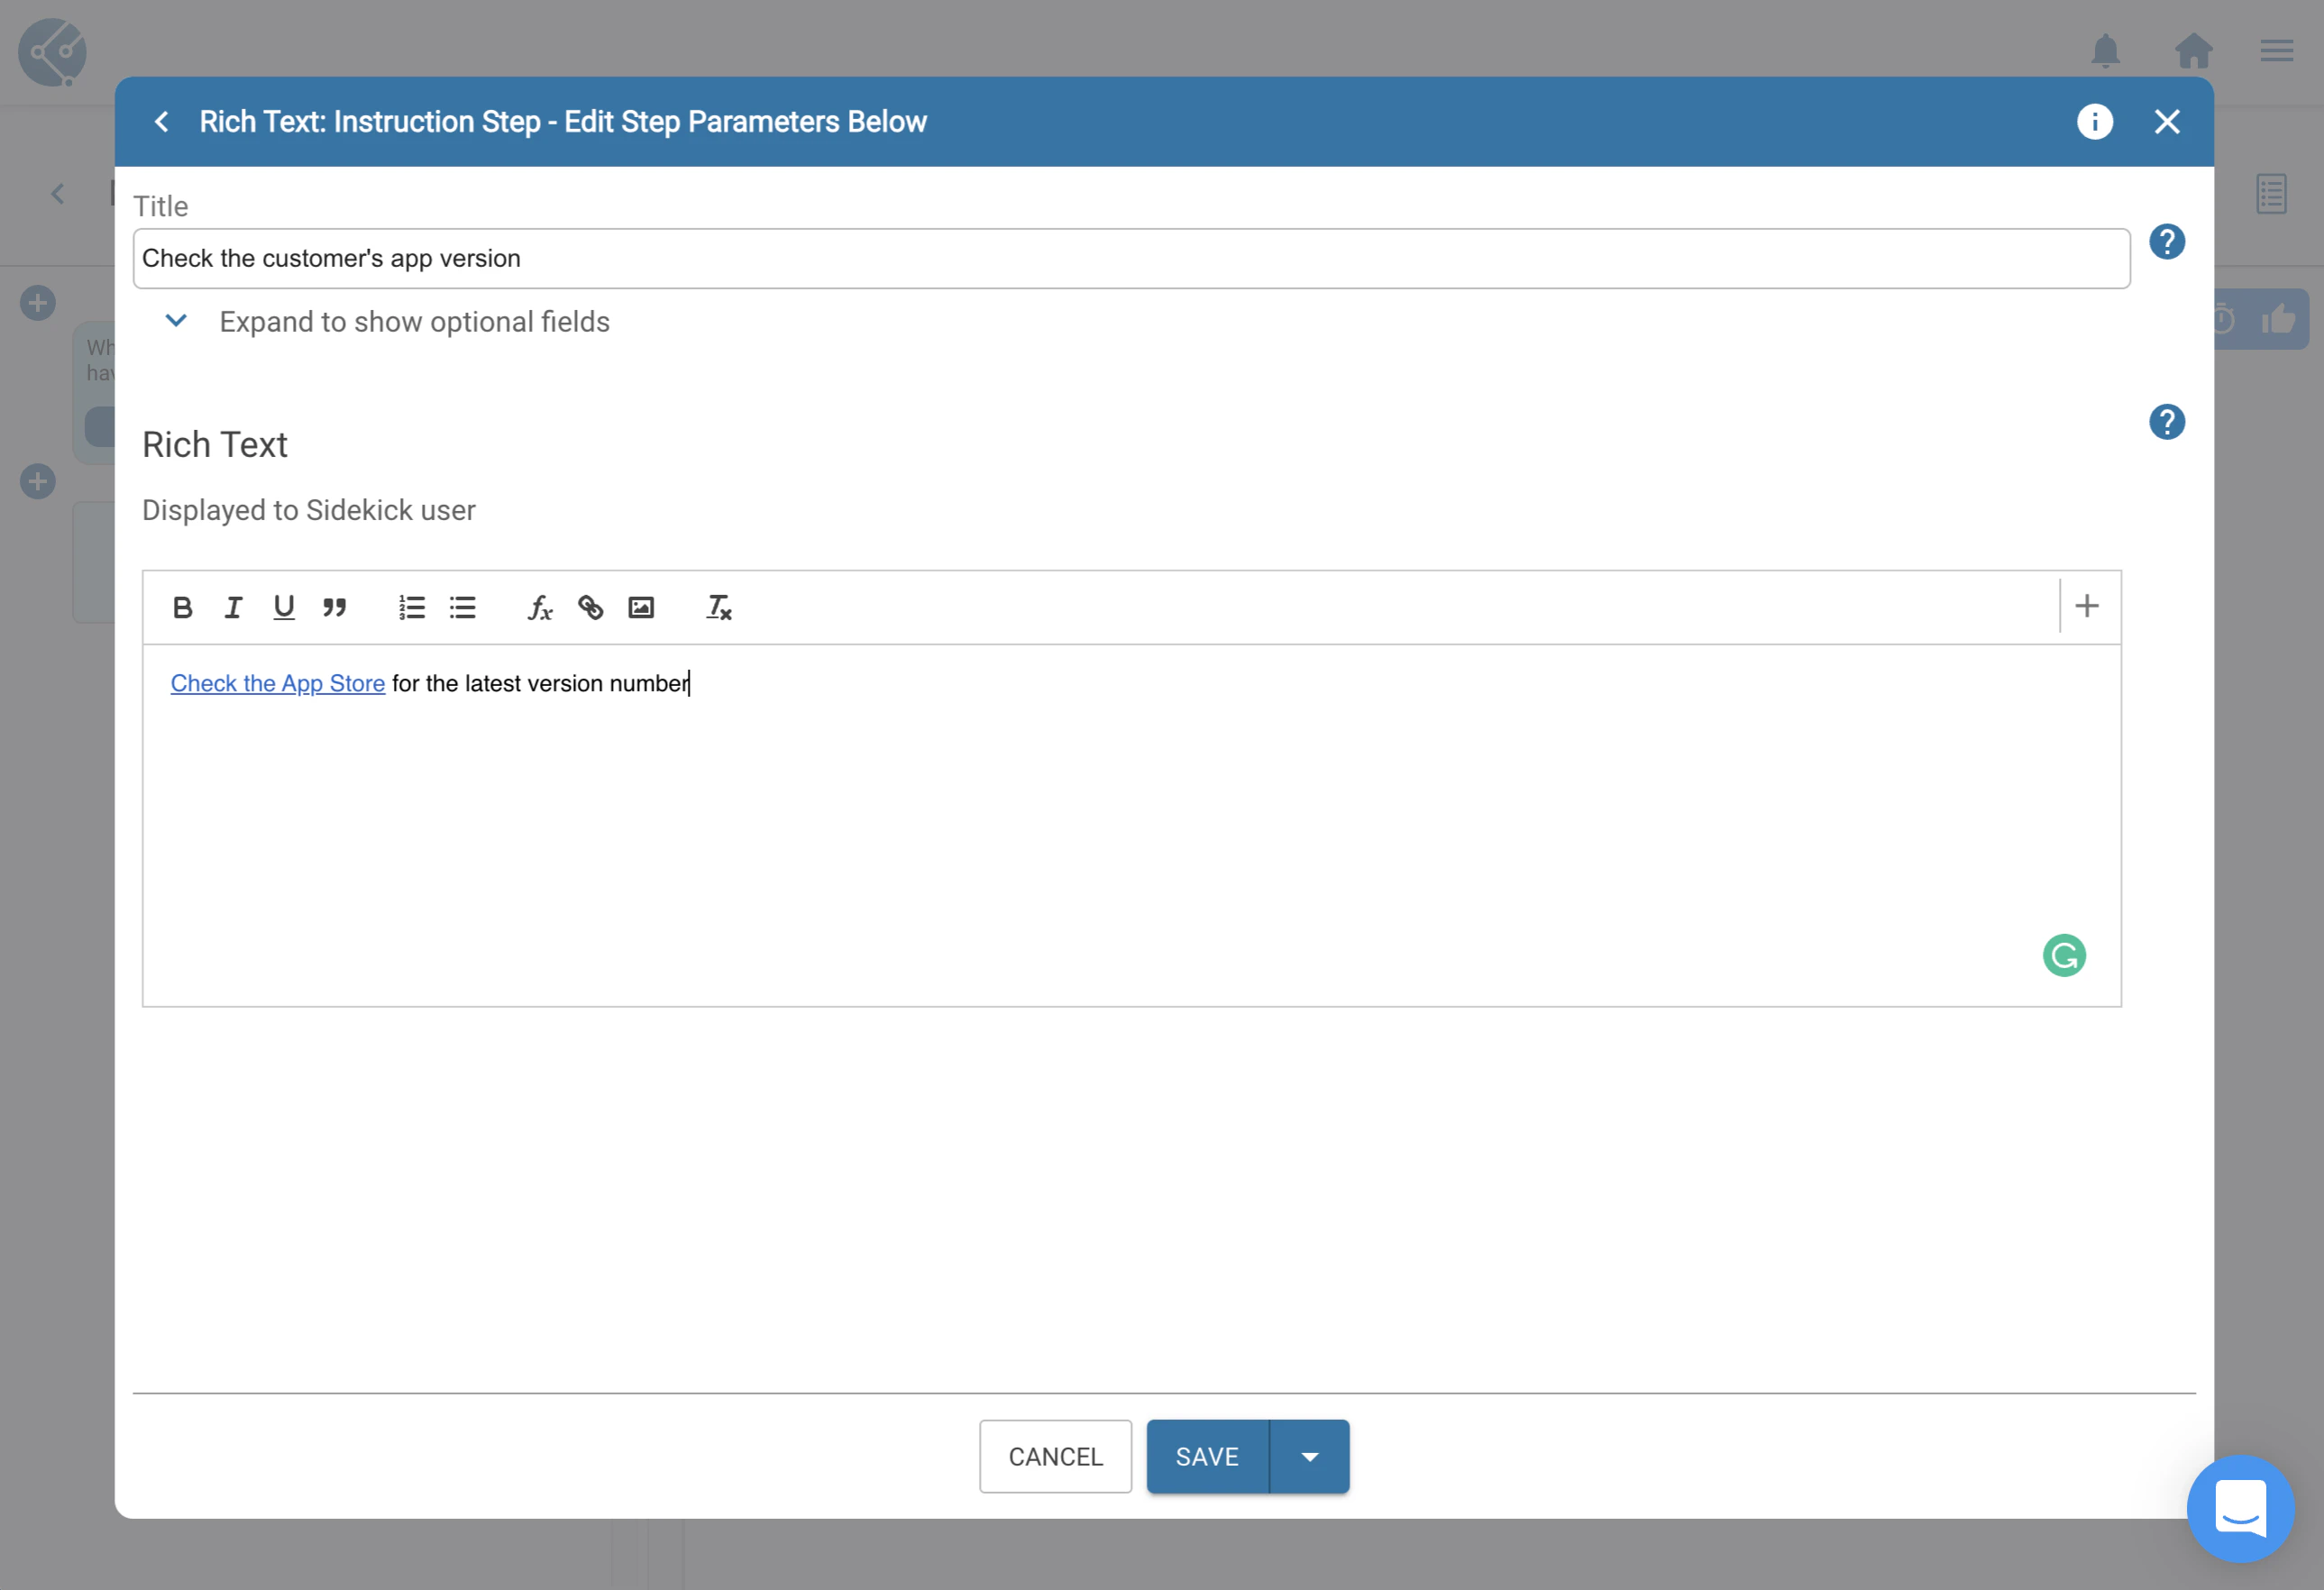
TitleThis text will appear up top in Sidekick and so is a good place to summarize what you want your team to do. In this case, we’ll use “Check the customer’s app version”Rich TextHere, similar to the Decision Tree steptype, you can provide more detailed instructions. Because it’s rich text we can do more than just add plain text. We want your team to check the latest app version, so add a hyperlink straight to the app’s page in the App Store;
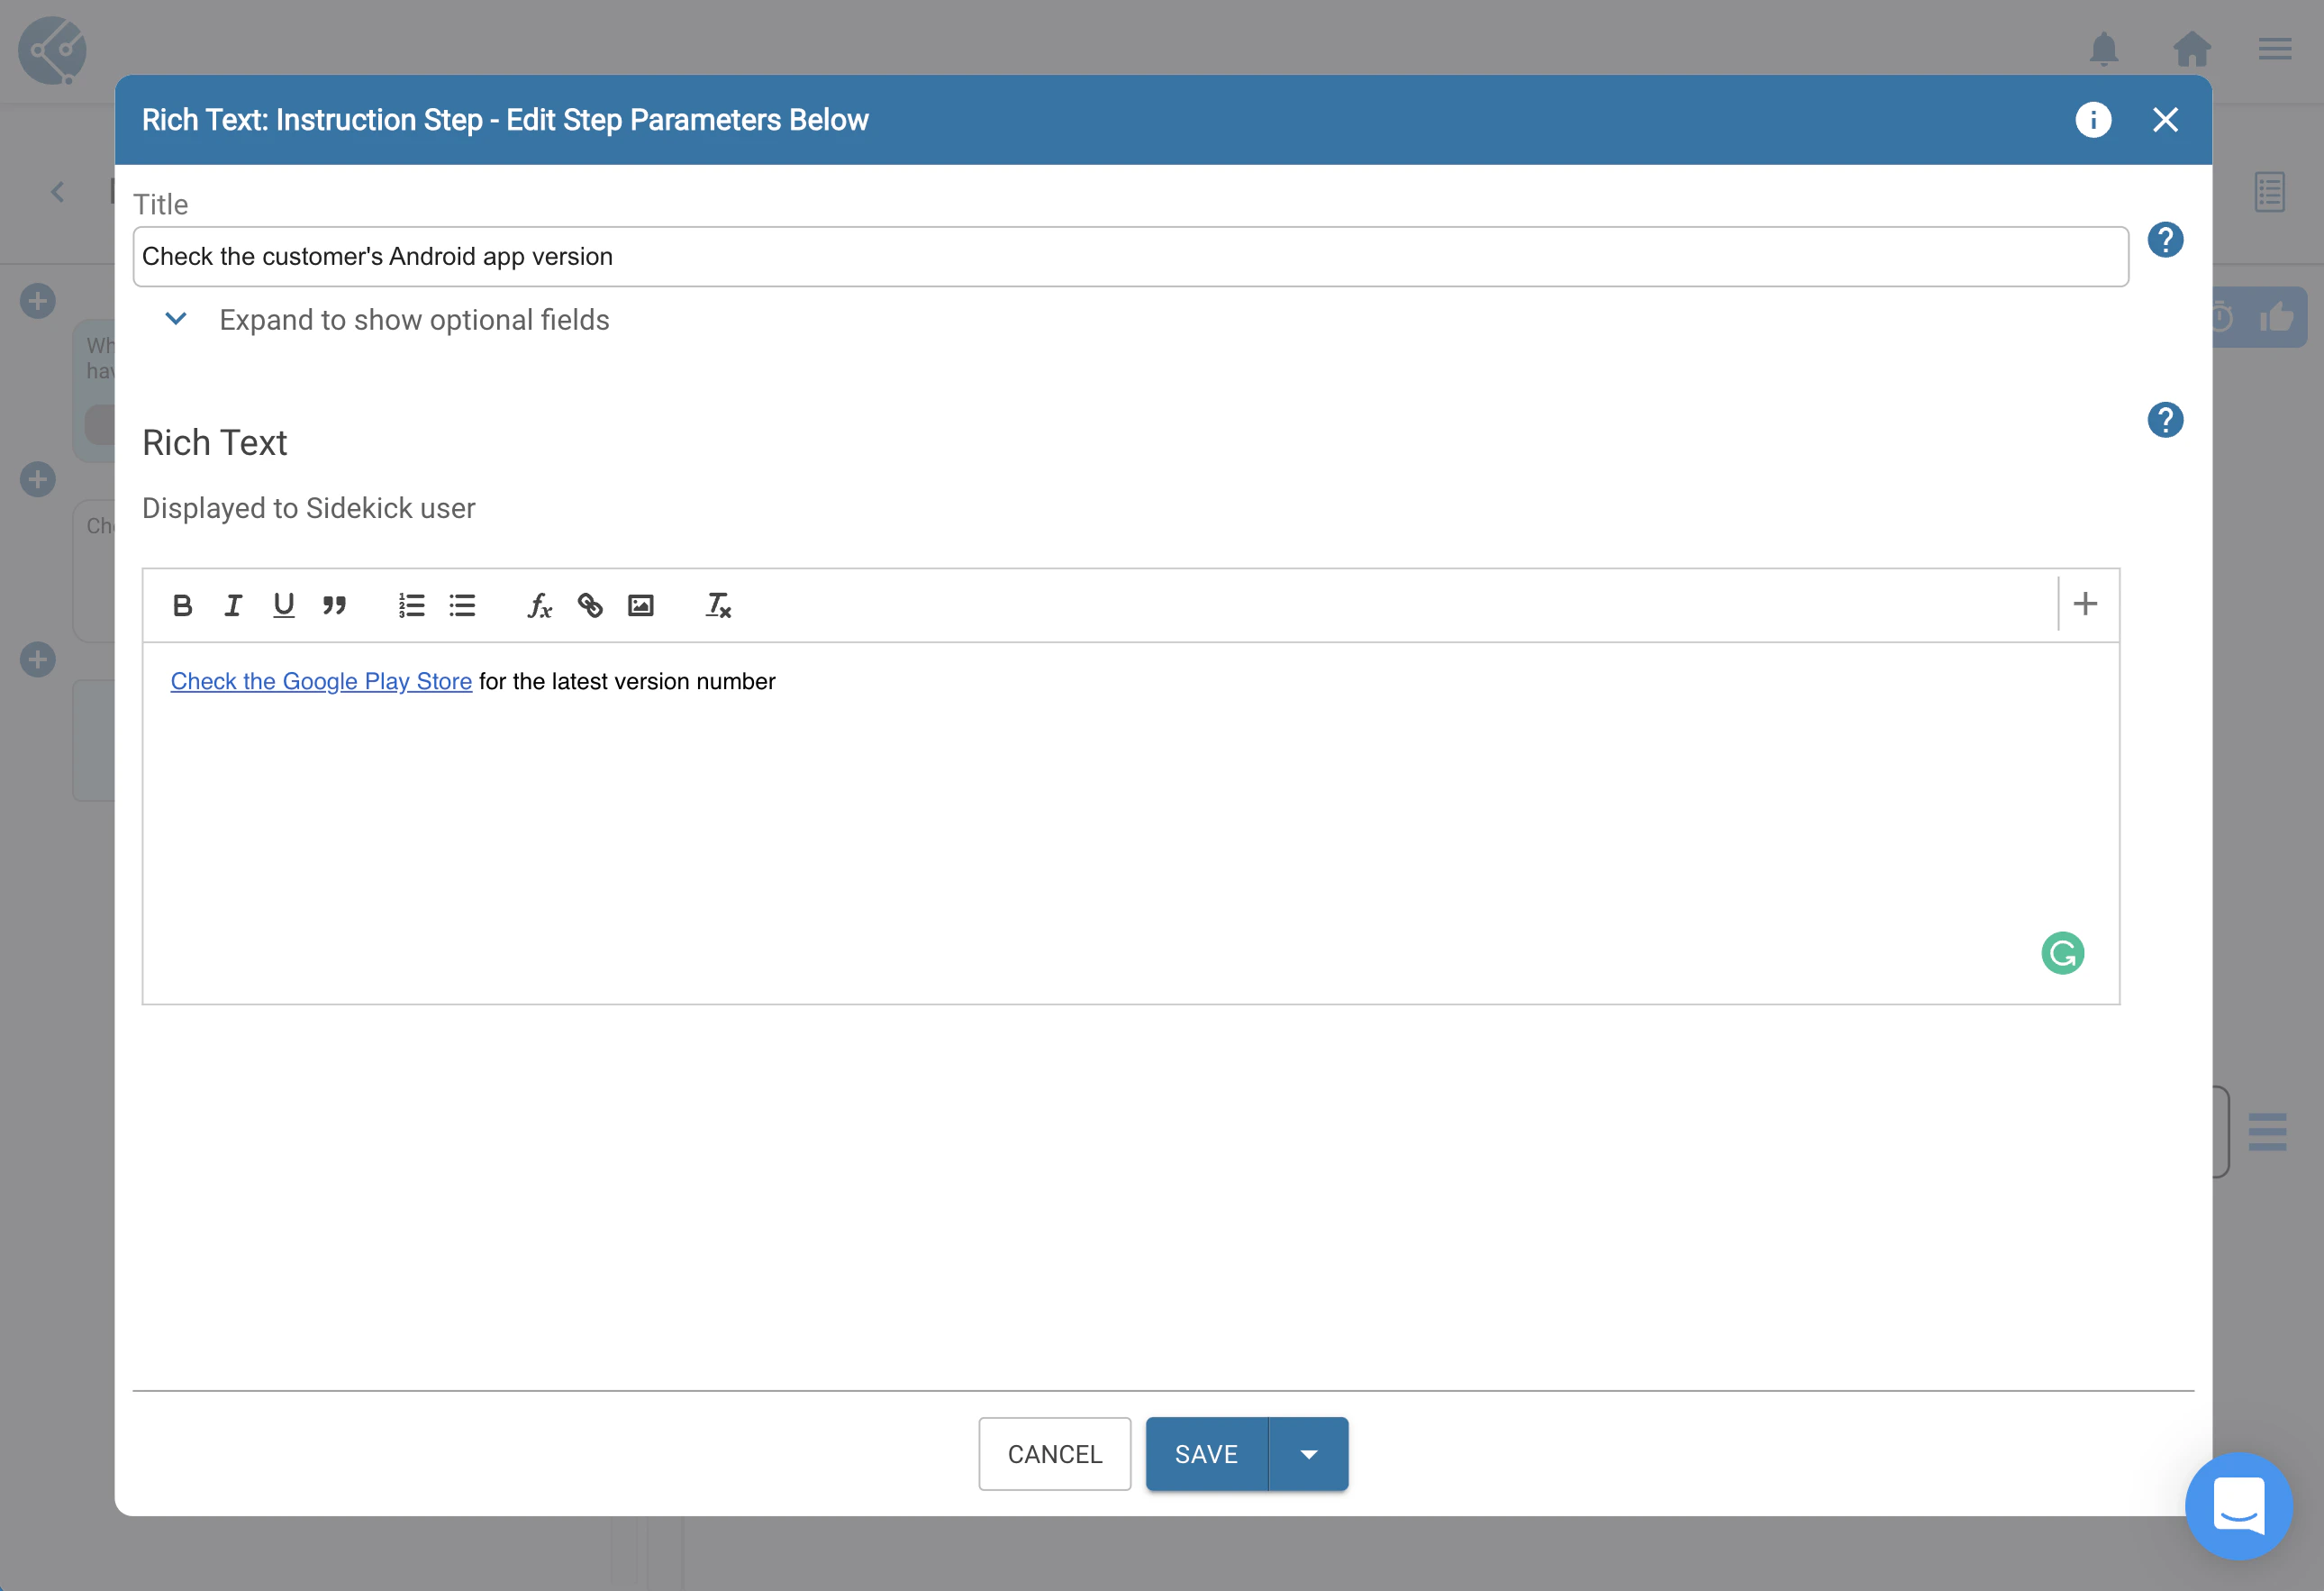
Since the Android step will be similar to the iPhone step, except for pointing to a new page in the Google Play Store, repeat the steps above to fill out the Android branch.
Now that we have both decision branches built out, click the Publish Changes button, then click Confirm. Once the Flow is published you’ll be able to run through it in the Sidekick app.
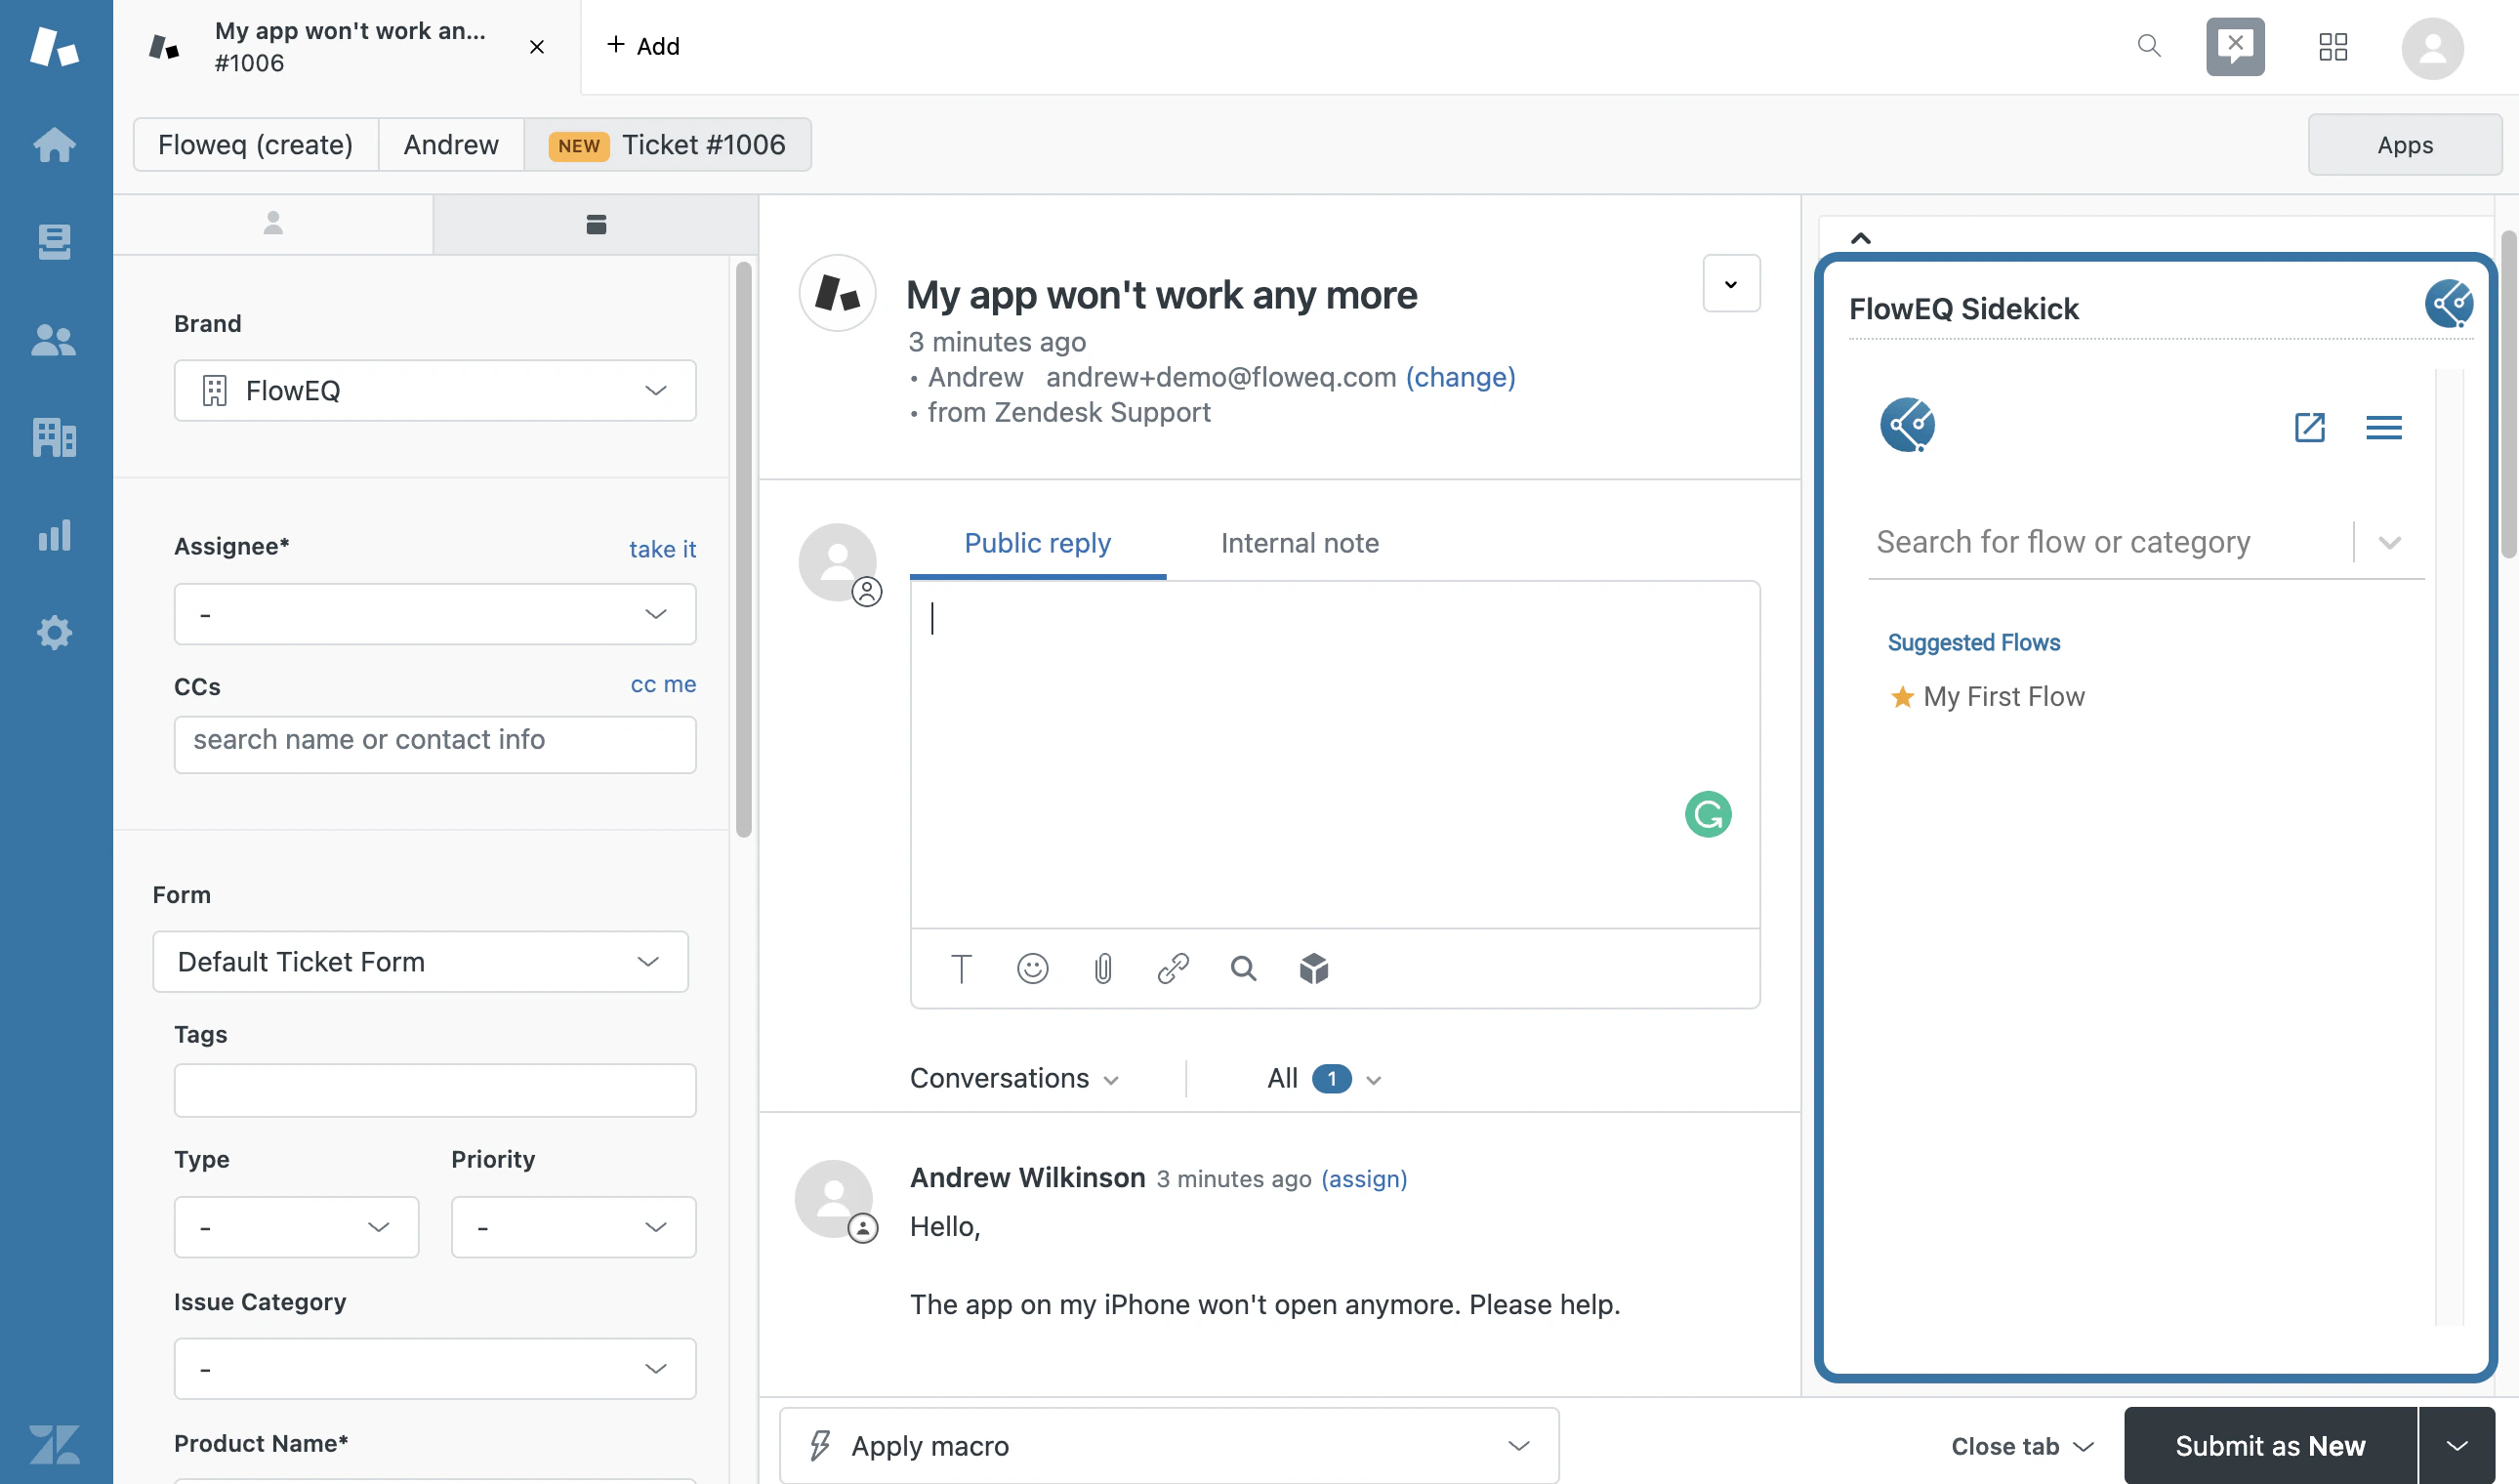
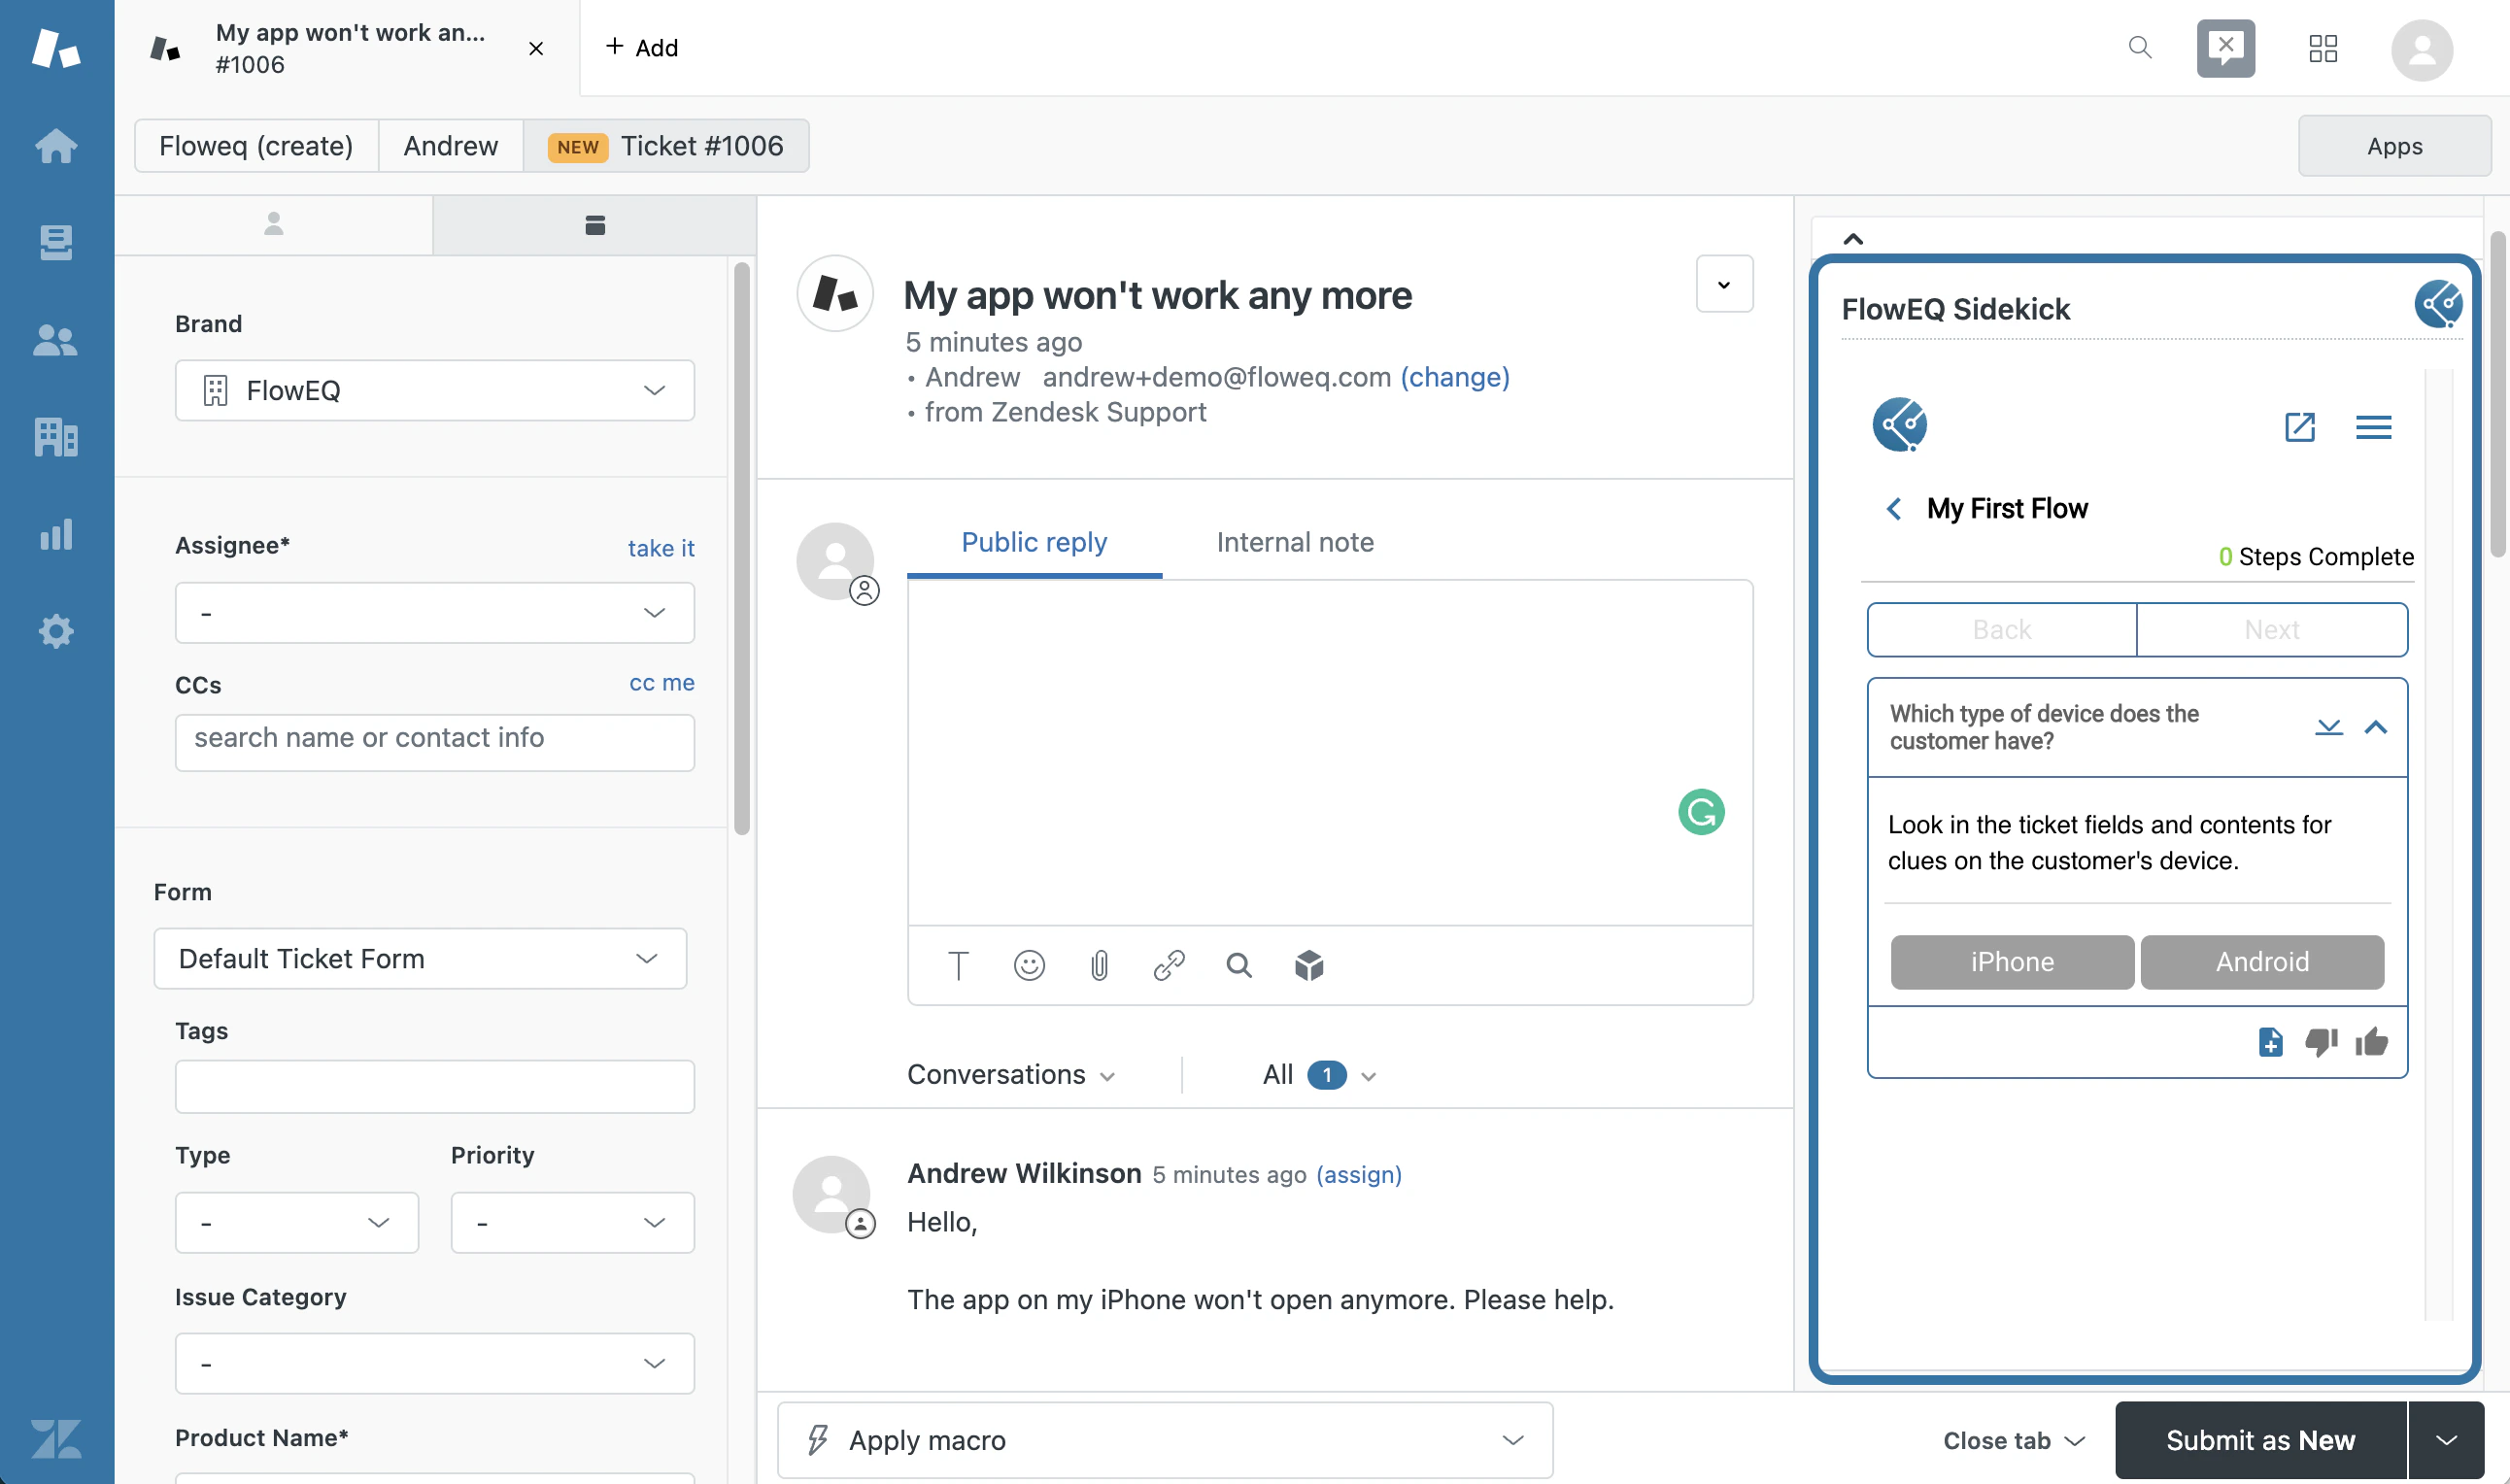
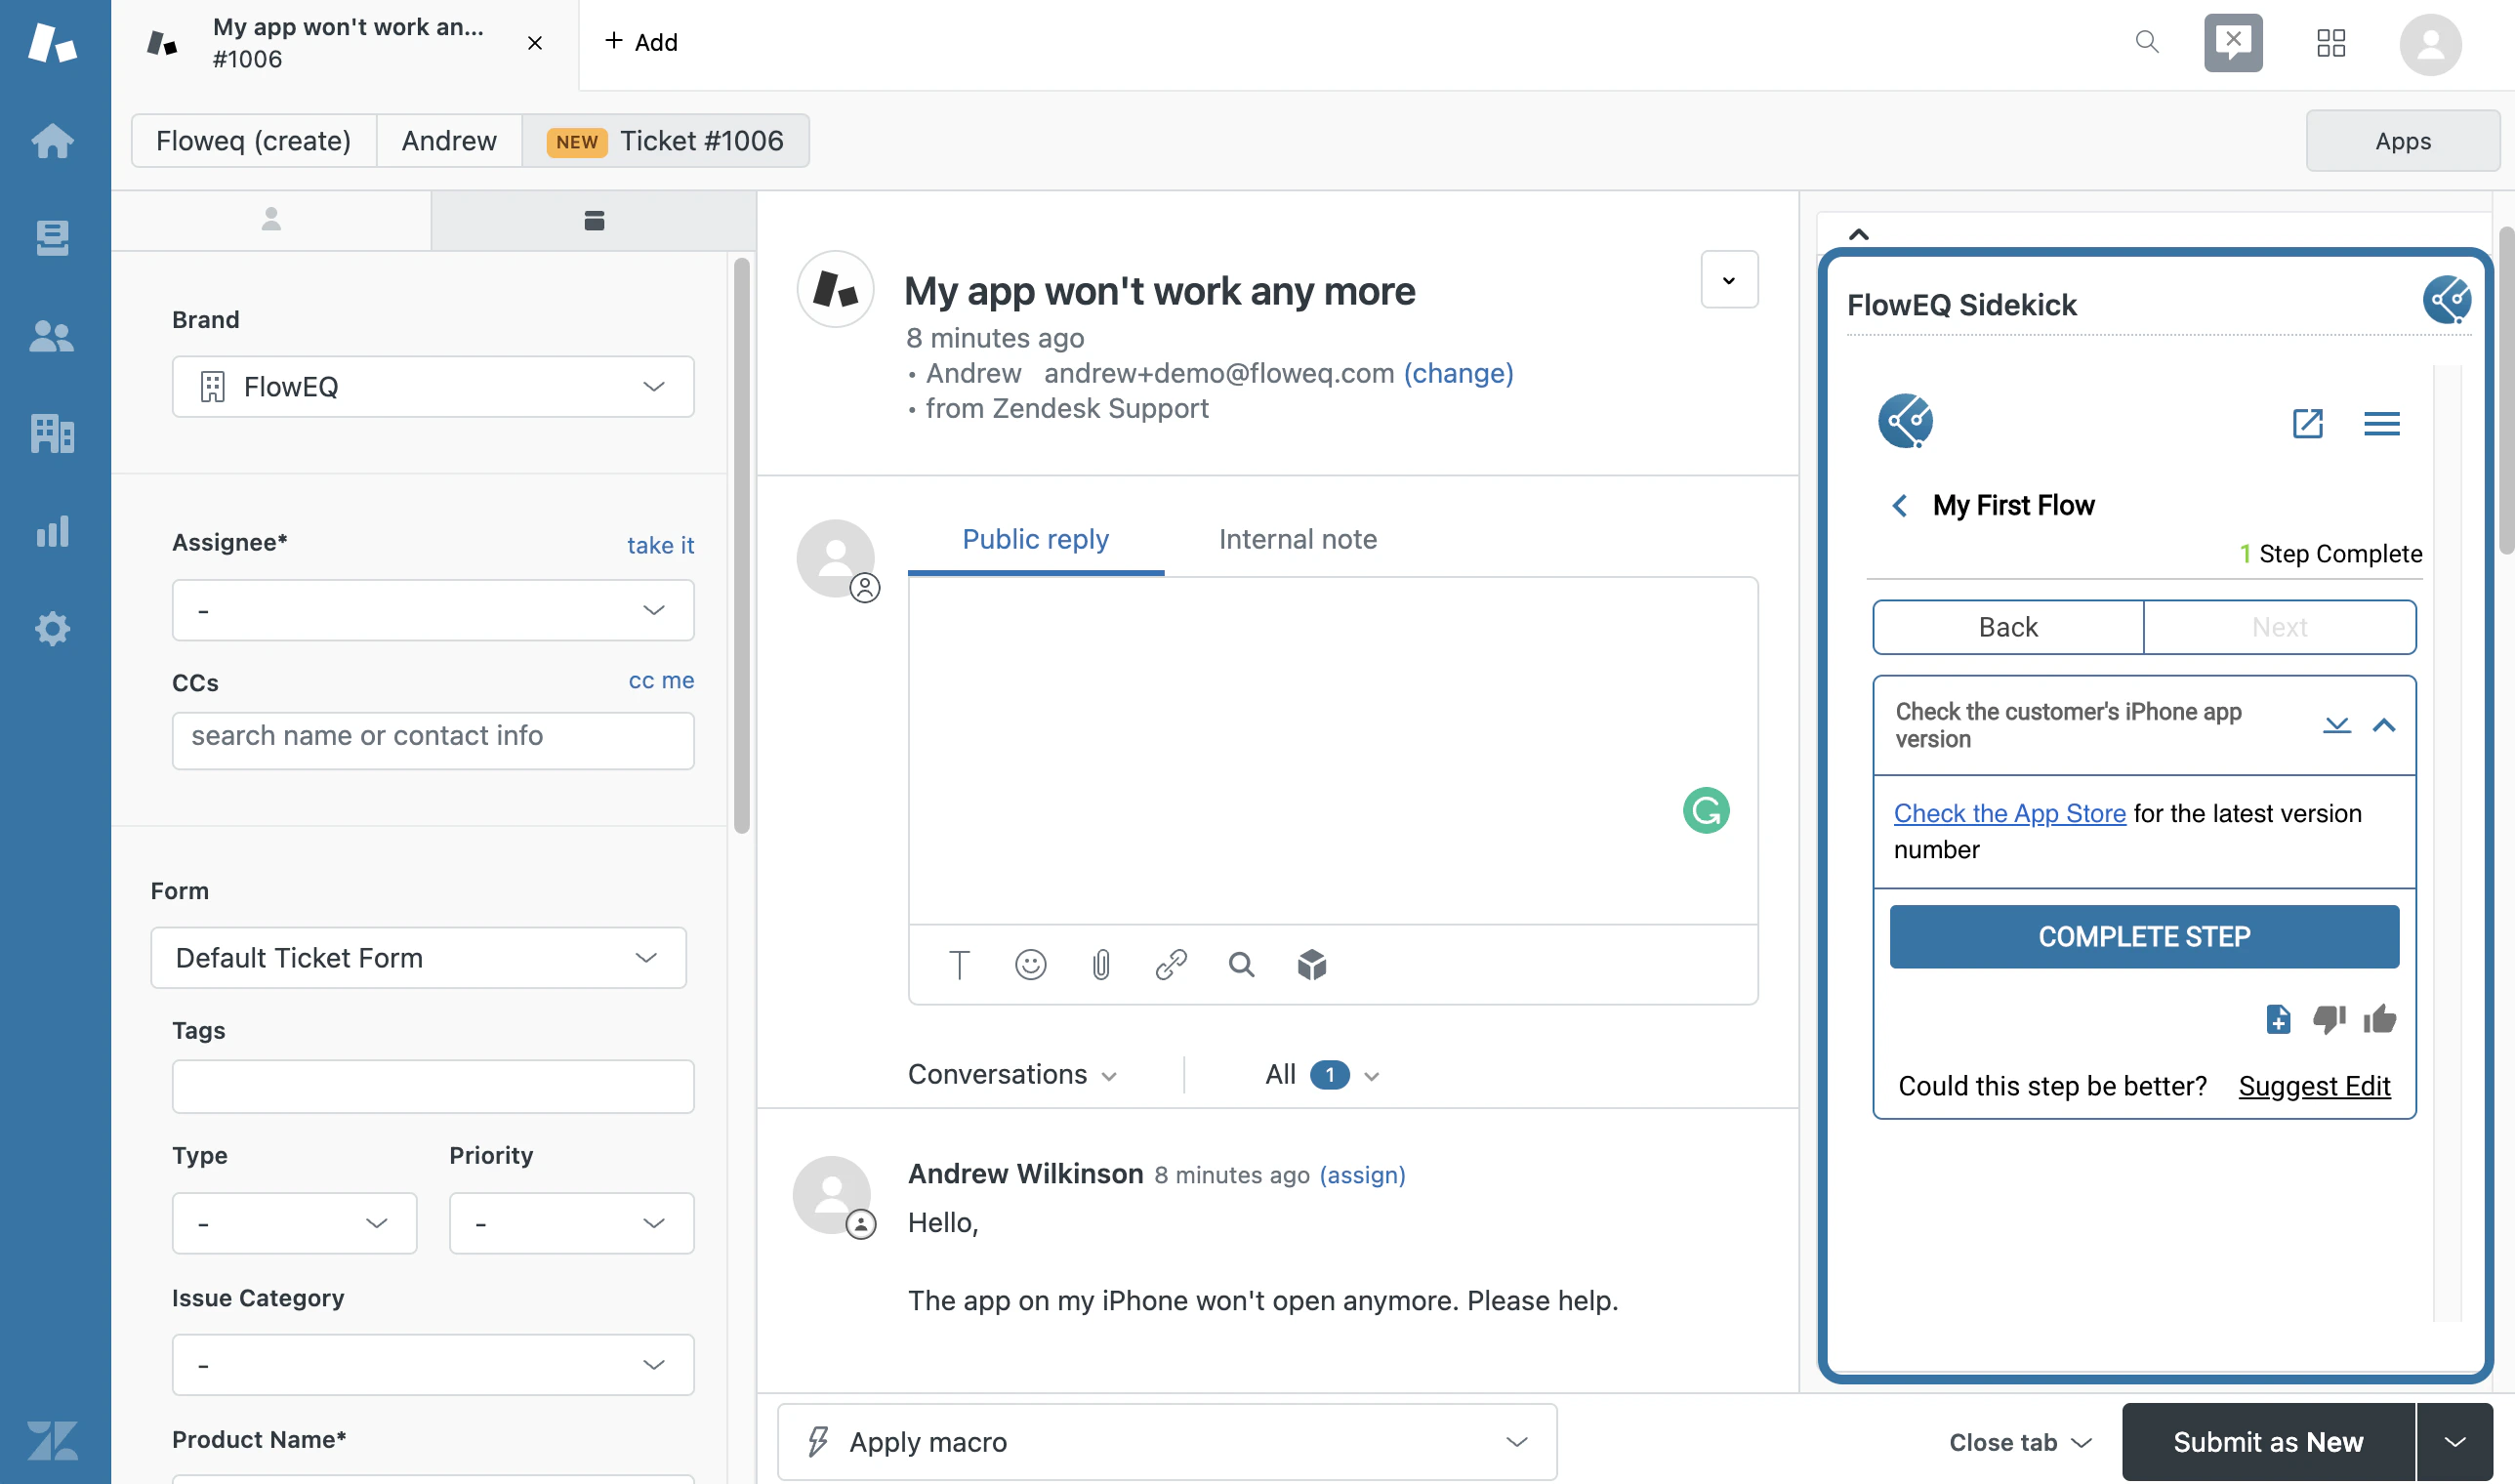
Navigate into a ticket in your CRM and you will see the FlowEQ Sidekick app on the right rail.Click “My First Flow” to open the Flow as your team would and you’ll be presented with a question about phone types and two decisions (iPhone and Android) to choose from.In this example, the customer has an iPhone, so go ahead and click the iPhone buttonAfter clicking the iPhone button, the Rich Text step that you added under the iPhone branch will appear, prompting your team to check the iPhone app’s version by clicking the hyperlink.And with that, your first step is complete! We’ve just scratched the surface here, but after going through this process you can now start with building more sophisticated Flows and know how to run them in your CRM.