In order to activate Workboard, you will need to have a FlowEQ custom plan that includes Workboard. Please reach out to us at [email protected] if you would like to add this to your plan.
Make sure you click the Save button at the bottom of the page after making changes. Unlike Flow Builder, your changes are not saved as you go. If you change a View Layout and exit the page without saving your work, your work will be lost.
Create a View Layout
- Open the Workboard app
- Below Custom Record types, click the Configure View Layouts button.
- If you haven’t created any View Layouts yet, click the big plus icon, or select the View Layout you’ve already made to continue.
- Under Layout Name, give your Layout a memorable name for enabling this layout later.
- Under Record Type, select the type of Workboard record containing the data you wish to show in your layout.
Tabs
Precisely like the tabs in your favorite web browser but contains your Workboard data. Use tabs to group data with a common theme together. For example, RMA Details or County Filings. Each Tab needs a name, which will appear on the Tab Label.Columns
Within Tabs, data is arranged into separate Columns. These are different from the columns in the table. Instead, this is where you can put entire tables into different columns. You’ll only need one column if you want a Custom View with just one table. But if you want to show two tables side by side, you’ll need two columns.Items
You can think of items are individual tables configured to show data from a particular source. You have a few different item types to choose from:Values
This is where you decide which specific fields from the specified item to display in the current item, column, or tab. Since you already specified the record type, you can use the dropdown picklist to select the available fields from that record.Add a Tab, Column, and Item
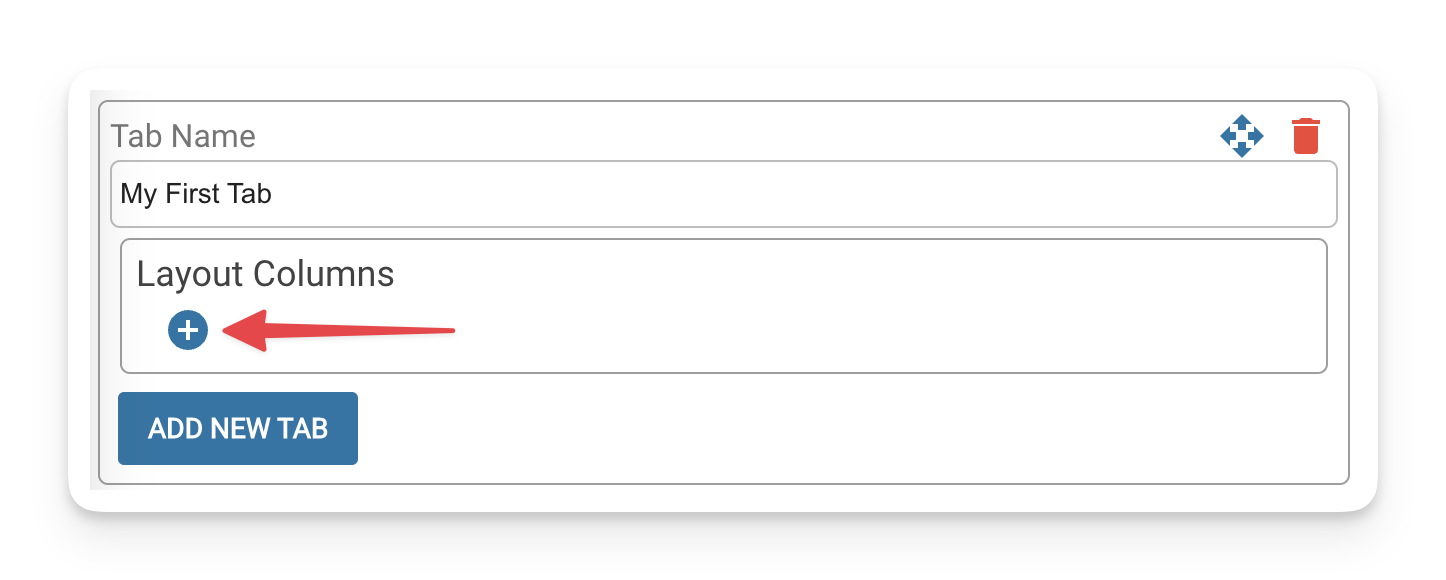
- Click the Add New Tab button to add your first tab. Be sure to give your tab a name in the Tab Name field.\

- Now that we have a tab, we need to fill it with at least one column. Under Layout Columns click the plus button.\
- Same as Tabs, give your new Column a name. This will appear above the table headers you’ll add to this tab.
- Click the Add New Item button. Give your Item a name that will appear alongside the data in the table.
- Select the type of item you wish to show in this column. (See below for information on the Item Types)
- After specifying an Item Type, click the green Add Field bar.
- From the Field column, you can just use the dropdown to select the fields you want to show from the Item you specified in Step 10.\
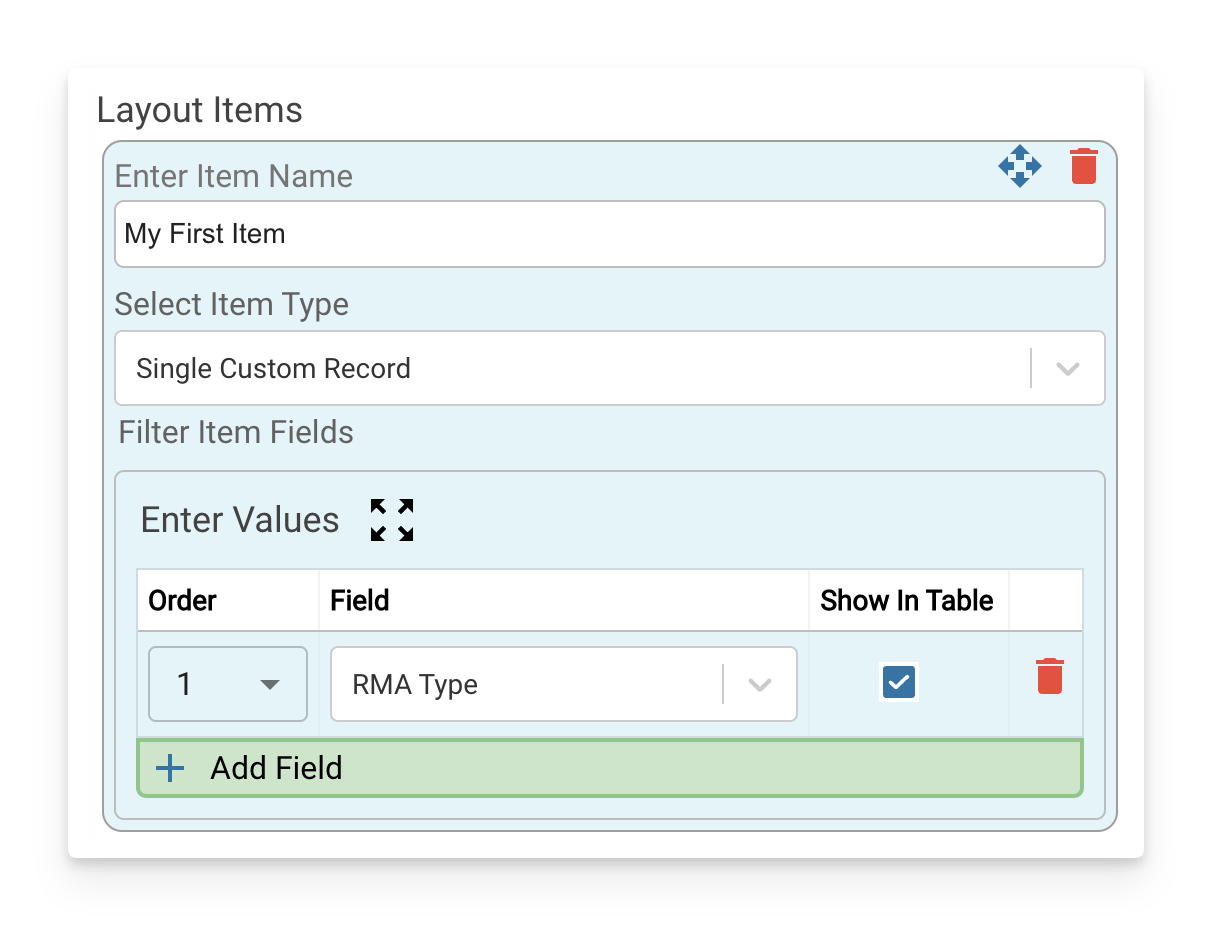
- Once you’ve added one Value, repeat Steps 6 and 7 until you have constructed a list of all the fields you want to show from the specified Item.
- When you’re done, click the green SAVE button at the bottom of the page.
Item Types
Single Records
- Custom Record - Select this to show the details from an individual Workboard record
- Salesforce Record - Select this to show data imported from your Salesforce.
Related Records
- Related Salesforce Records - Select this to show data from your Salesforce instance related to a specific record but not the specified record itself.
- Related Salesforce Attachments - Select this to present any attachments to the specified Salesforce record.
- Related Salesforce Emails - Select this to show email threads related to a specific record from your Salesforce instance.
Matching Records
- Matching Custom Records - Select this to present any Workboard records that fit the criteria.
- Matching Salesforce Records - Select this to present data from Salesforce records that meet your criteria.
How to build upon your first View Layout
The steps above will guide you through constructing your first table in your first View Layout. Here’s how you can add different layers to build upon that first Layout.To add a new tab
Click the Add New Tab button at the bottom. Tabs will appear left to right as they do in your browser, but in the top-down order, they are listed in this View Layout. For example, the topmost Tab will appear on the far left when viewed in Workboard. The next tab down will appear to the right of the first tab, and so on.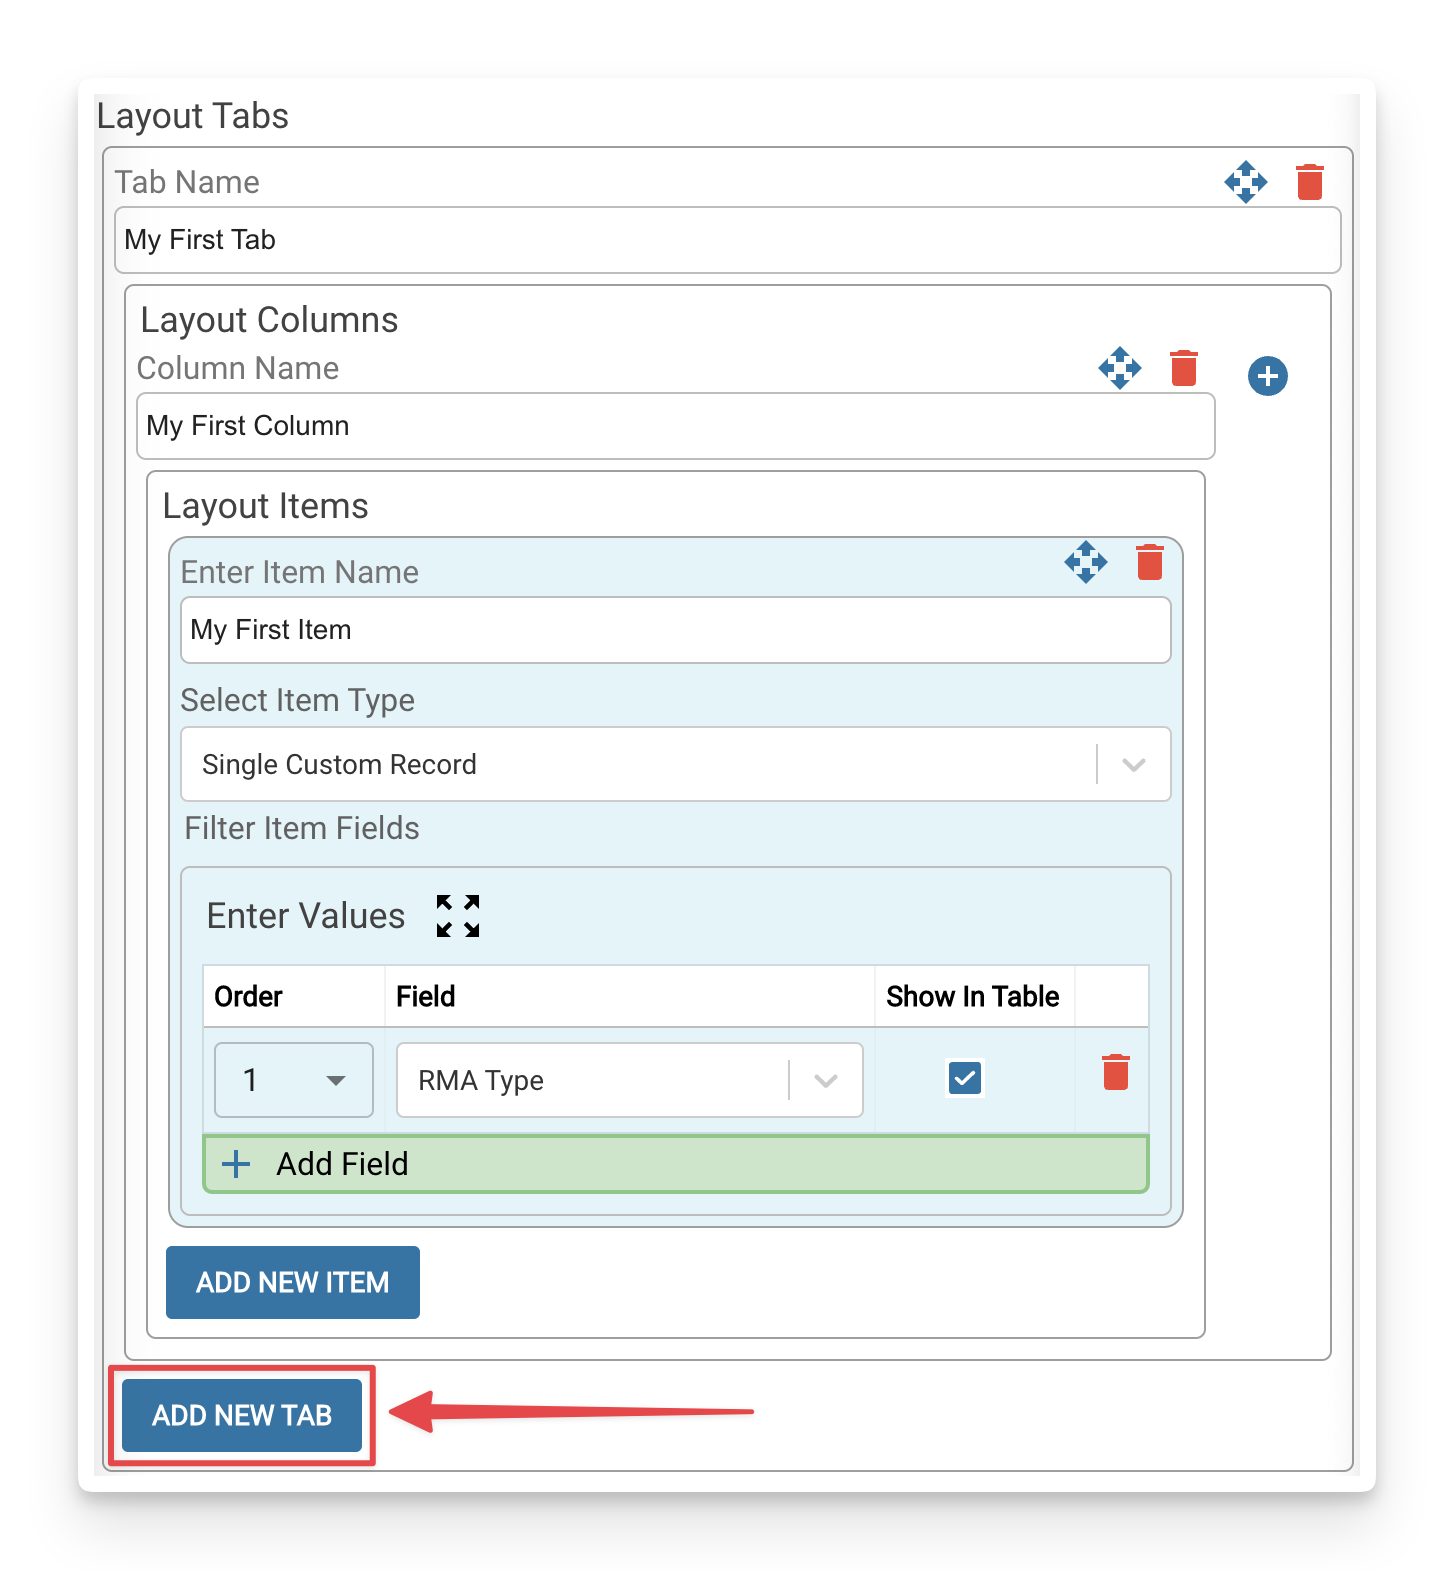
To add a new Column
Navigate to the Tab where you want to add a new column of tables, then click the blue ⊕ Add New Column button in the top right of the Tab window.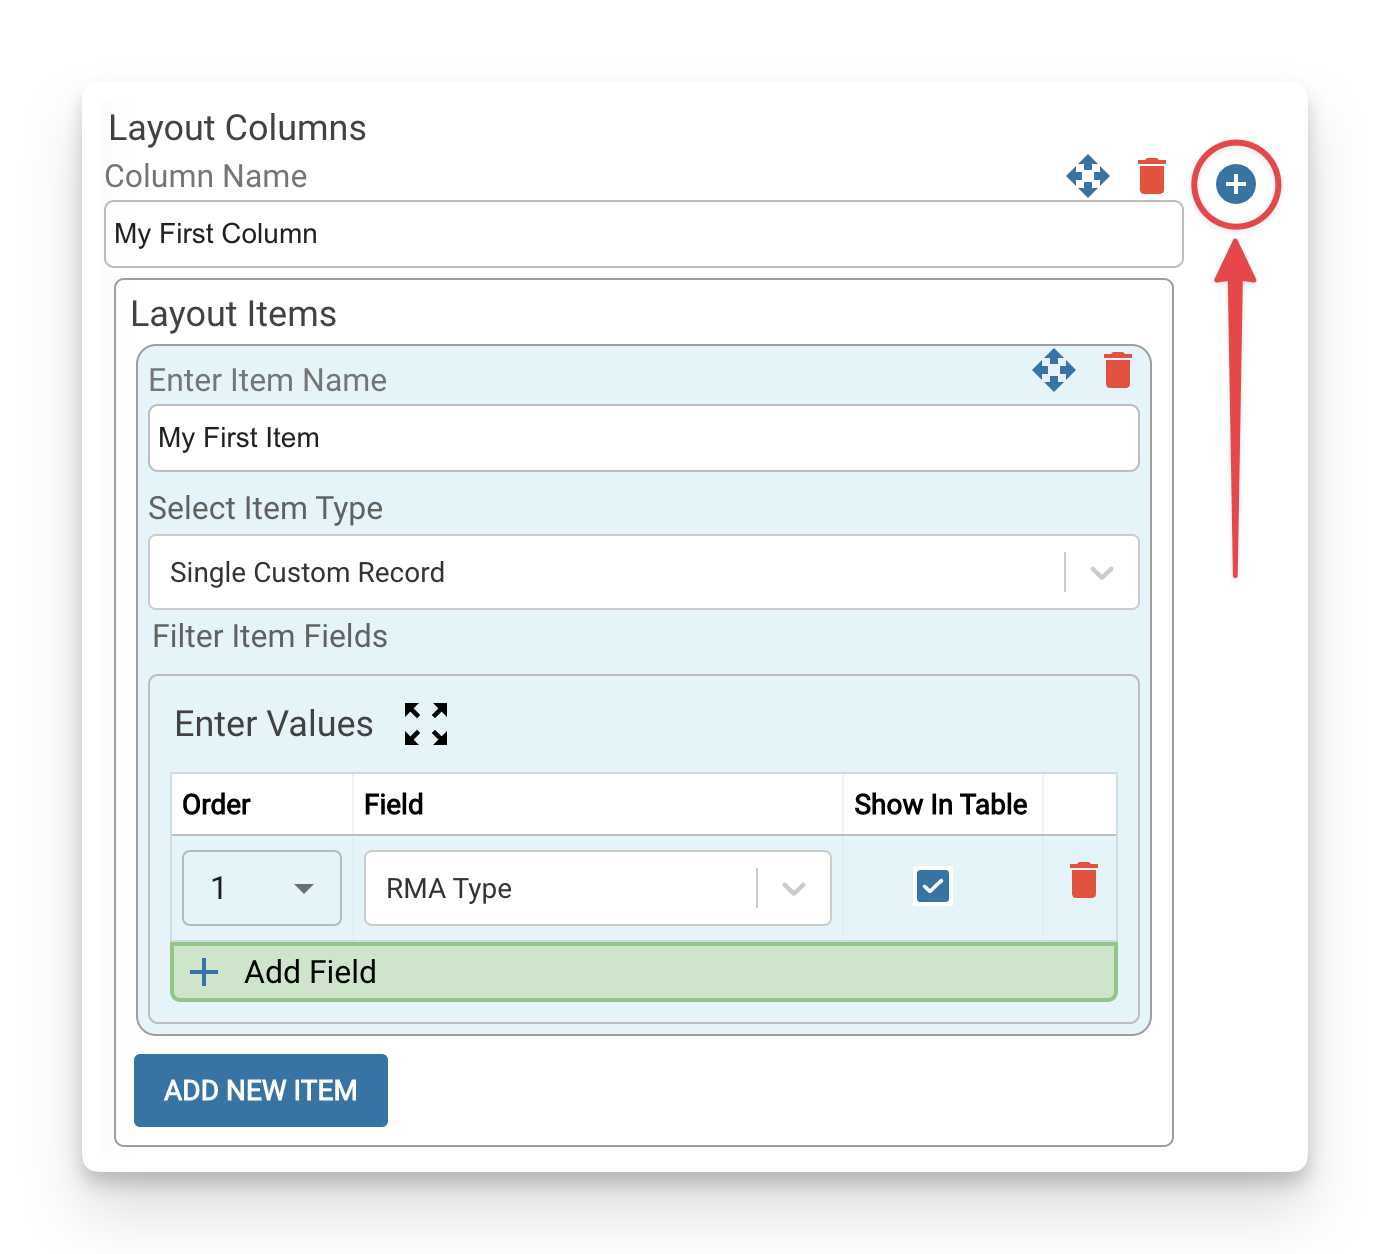
To add a new Item
Navigate to the Column where you want to show new data, and click the Add New Item button to create a new table of values to show.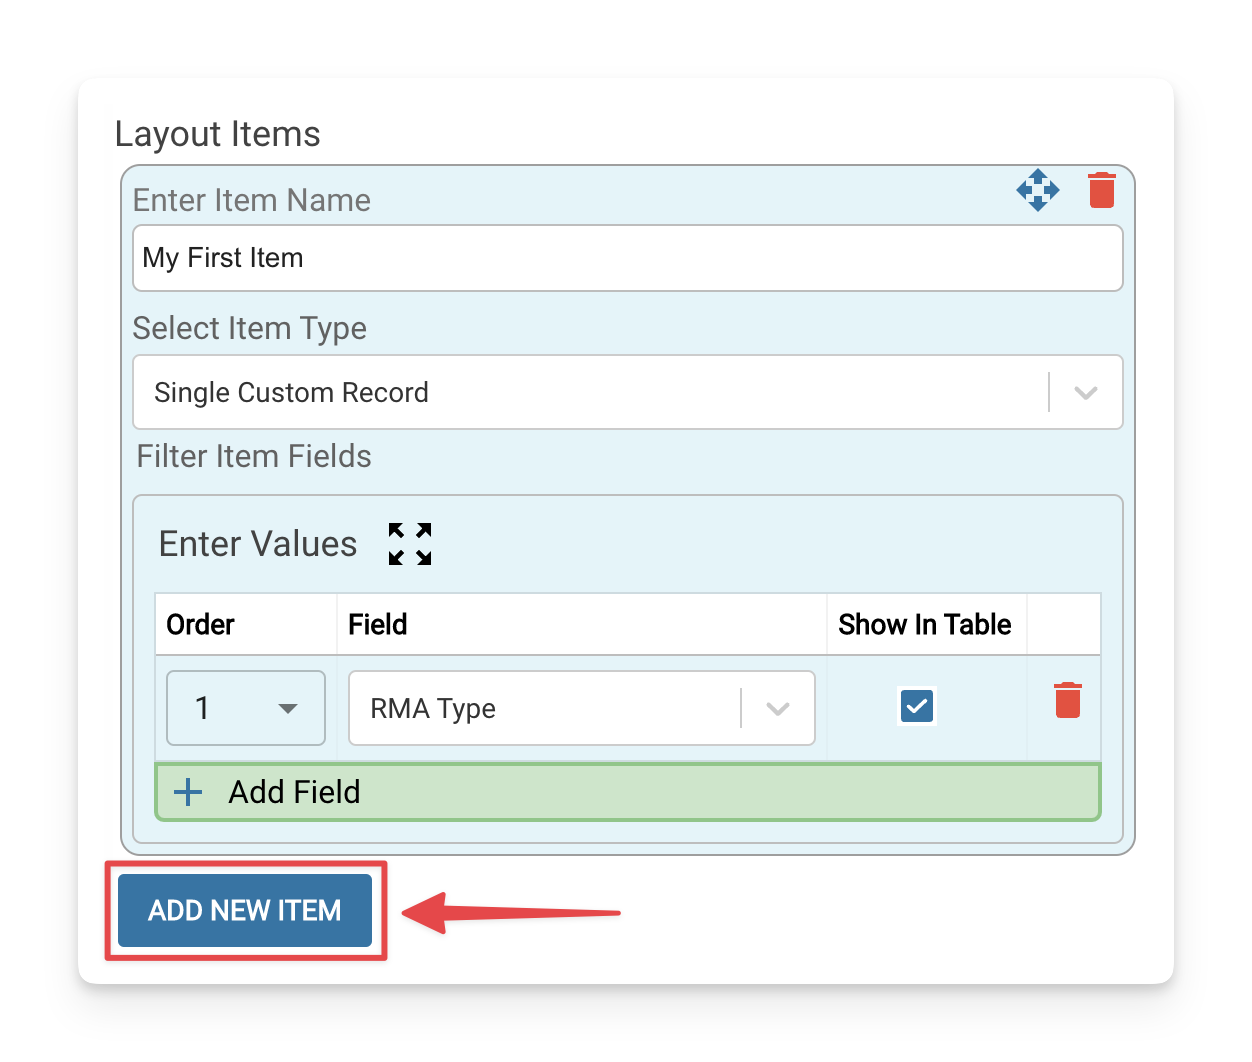
To add a new value
Navigate to the Item where you specified which type of record you want to show, click the Add Field button, and then select a new field to present from the specified record.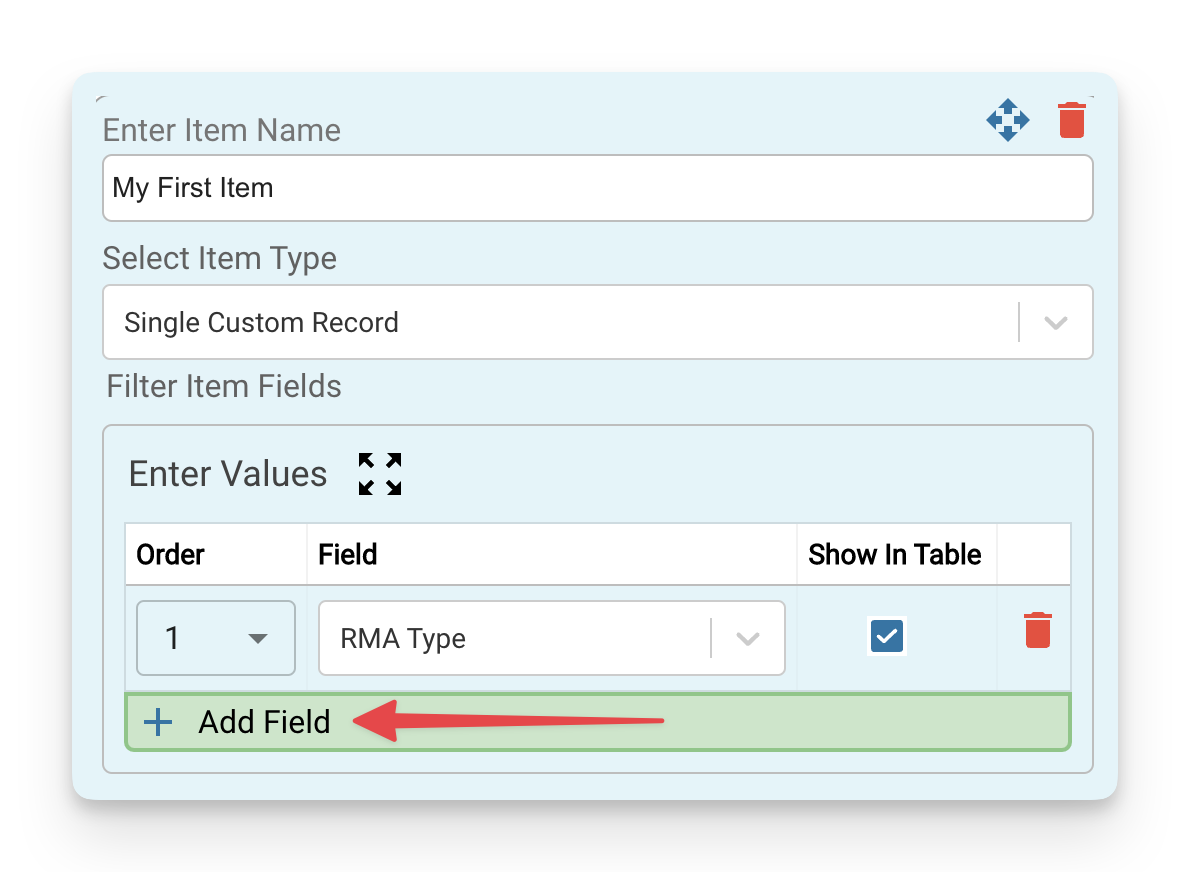
How to rearrange your View Layout
Rearrange Objects
You can move any object on this View Layout to a new position by clicking the Reposition button. When clicked, valid targets for where you can move that item will start flashing. You can move any object wherever you need as long as there is a containing object to go into. For example, if you want to move an Item into another column, you’ll need to create that other column first.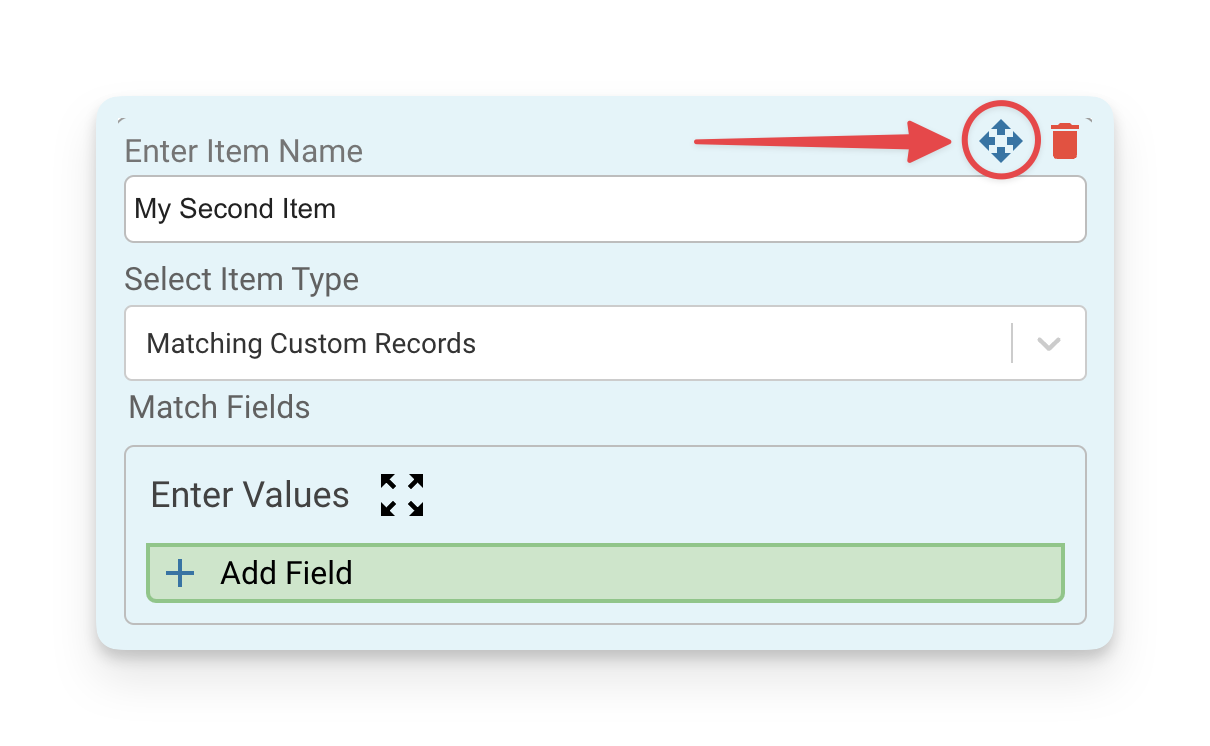
Delete Objects
Click the red trashcan icon on any object to delete it from the View Layout.Enable your View Layout
Once you’ve configured your View Layout how you want it, here’s how to change a Workboard bucket to use it.- Open your Workboard. You’ll see a list of buckets and the records within the current bucket.
- In the top left corner of the screen, turn on the Edit Mode switch.
- Hover over the bucket you want to use the new View Layout, and click the Pencil icon
- On the right side of the Edit Existing View window, use the Select Layout dropdown to implement your layout for this bucket.
- Click Save at the bottom of the page to save your changes.