Prerequisites
- A Shopify account with Admin privileges or explicit Develop Apps permissions. If you lack the necessary permissions, contact your Shopify Administrator. For more details. check out Shopify’s article on API Scope Permissions for Custom Apps
- An Admin user account in FlowEQ to set up the Shopify integration. If you’re not yet an Admin, contact your FlowEQ Administrator.
- A FlowEQ admin must have logged in at least once into FlowEQ’s Next platform, at next.floweq.com, where we host our latest integrations and features.
- Note: If you encounter any issues, try clearing your browser’s cache. Here are the guides on how to do that for Chrome, Firefox, and Edge.
Create the custom app in Shopify
- Open Custom Apps in Shopify at admin.shopify.com/settings/apps/development
- Once logged in, the URL will change. Grab your Shop Name from the new URL between “store/” and “/settings” and note it for later. For example, if the URL is:
https://admin.shopify.com/store/floweqshop/settings/apps/development/then your Shop Name for the next section isfloweqshop - Click the Create an app button
- Under App Name enter “FlowEQ Integration”, then select the user that best fits in the App Developer field, then click Create app
- Click the Configure Admin API Scopes button
- In Filter access scopes, type “shipping” as a filter and check the read_shipping box
- Edit the filter from “shipping” to “variants” and check the read_products box
- Edit the filter to “customers” and check the read_customers and write_draft_orders boxes
- Edit the filter to “fulfillments” and check the write_fulfillments and write_orders boxes
- Edit the filter to “disputes” and check the read_shopify_payment_disputes box.
- Edit the filter to “returns” and check the read_returns and write_returns boxes
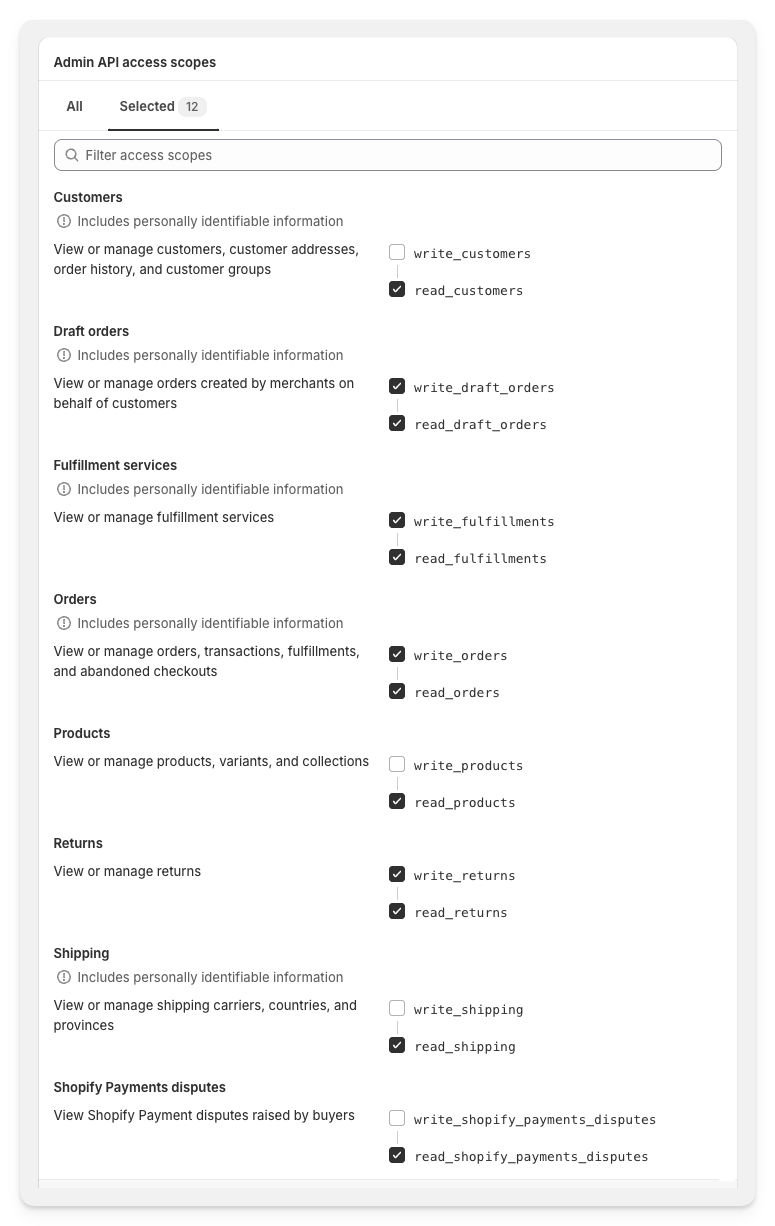
- Click on the Selected (12) tab, and your checked permissions should look like this:
- Now with the correct permissions, click the Install App button in the upper right, then in the popup that appears, click Install
- On the API Credentials tab, reveal the Admin API Access Token by clicking “Reveal token once ” and then the clipboard icon to copy it. Keep the token secure as it can only be revealed once.
Integrate the Custom App with FlowEQ
- Open the Shopify integration in FlowEQ at https://next.floweq.com/integrations/shopify
- In the Shop Name field, paste the Shop Name you noted from step #2 in the previous section. Eg. “floweqshop”
- In the Custom App Access Token field, paste the token you copied in step #12 in the previous section.
- Click the Add button. If asked, you may need to log into your Shopify account again.